A lot of developers experience a painful process with their code being deployed on the environment. We, as a company, suffer the same thing so that we wanted to create something to make our life easier.
After internal discussions, we decided to make a fully automated CI/CD process. We investigated and came up with a decision for that purpose to implement Gitlab CI/CD with google cloud deployment.
Further in this blog, you can see how we achieved that and how you can achieve the same.
Let’s start with setting up. 🙂

- First, let’s create Spring Boot Application from https://start.spring.io/
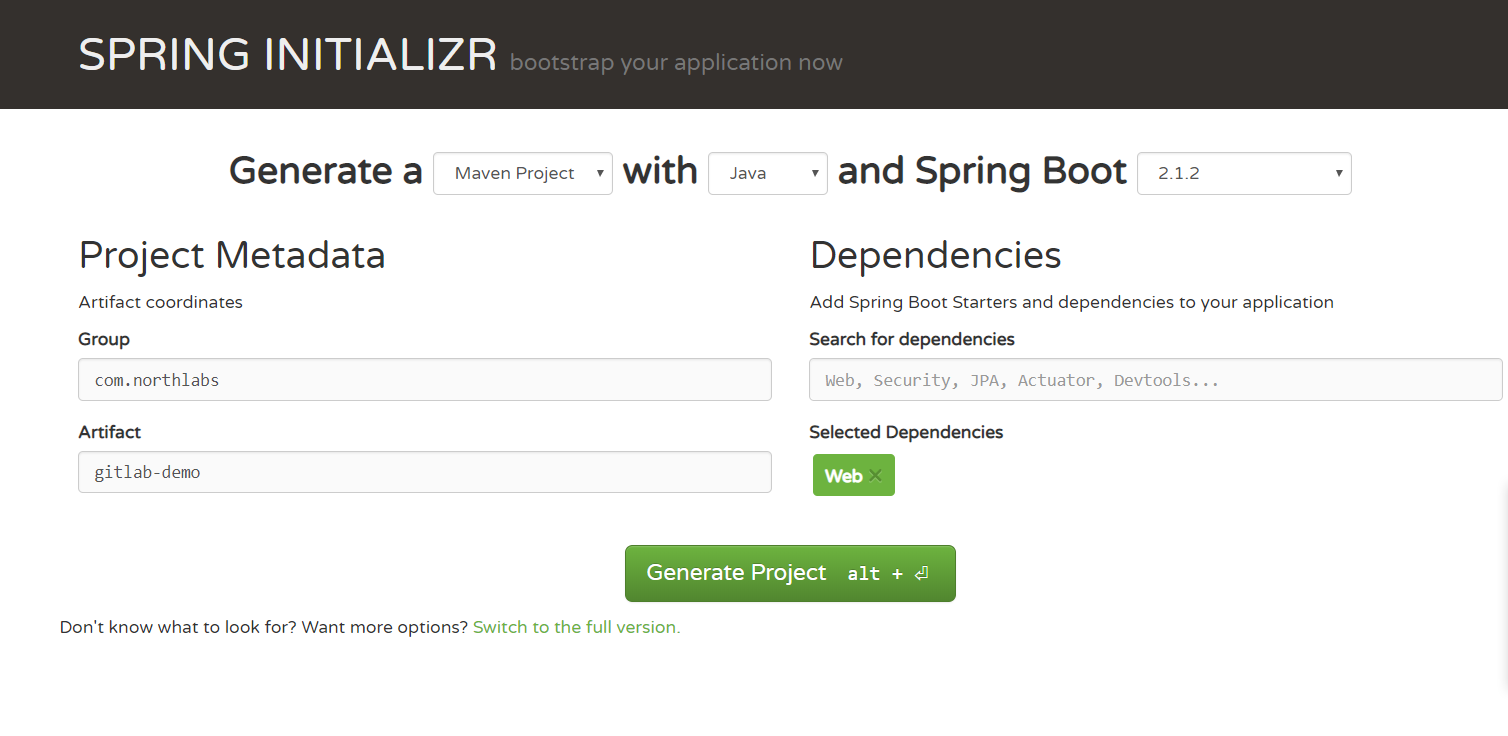
- After that, we create a simple rest controller for testing purposes.
package com.northlabs.gitlabdemo.rest;

import org.springframework.web.bind.annotation.GetMapping;
import org.springframework.web.bind.annotation.RestController;

@RestController
public class RootController {

    @GetMapping(value = "/")
    public String root() {
        return "Hello from Root";
    }

    @GetMapping(value = "/demo")
    public String demo() {
        return "Hello from Demo";
    }

}
- Next step is to push the application to our GitLab repo.
- cd path_to_root_folder
- git init
- git remote add origin https://gitlab.com/47northlabs/47northlabs/product/playground/gitlab-demo.git
- git add .
- git commit -m “Initial commit”
- git push -u origin master
Now, after we have our application in GitLab repository, we can go to setup Google Cloud. But, before you start, be sure that you have a G-Suite account with enabled billing.
- The first step is to create a new project: in my case it is
northlabs –gitlab -demo.
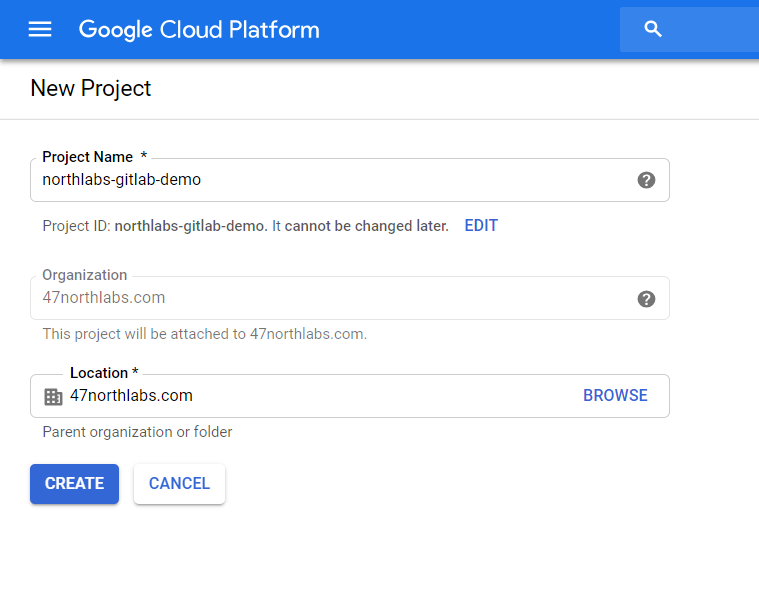
Create project: northlabs-gitlab-demo
- Now, let’s create our Kubernetes Cluster.
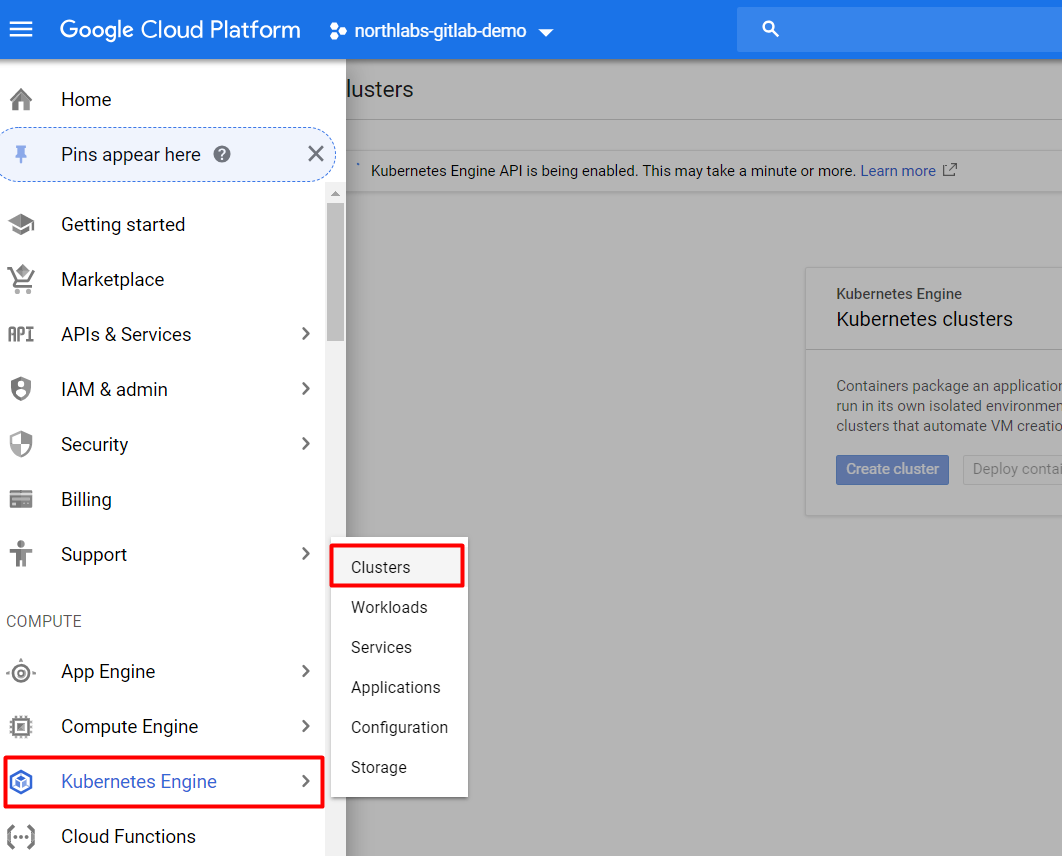
It will take some time after Kubernetes clusters are initialized so that GitLab will be able to create a cluster.
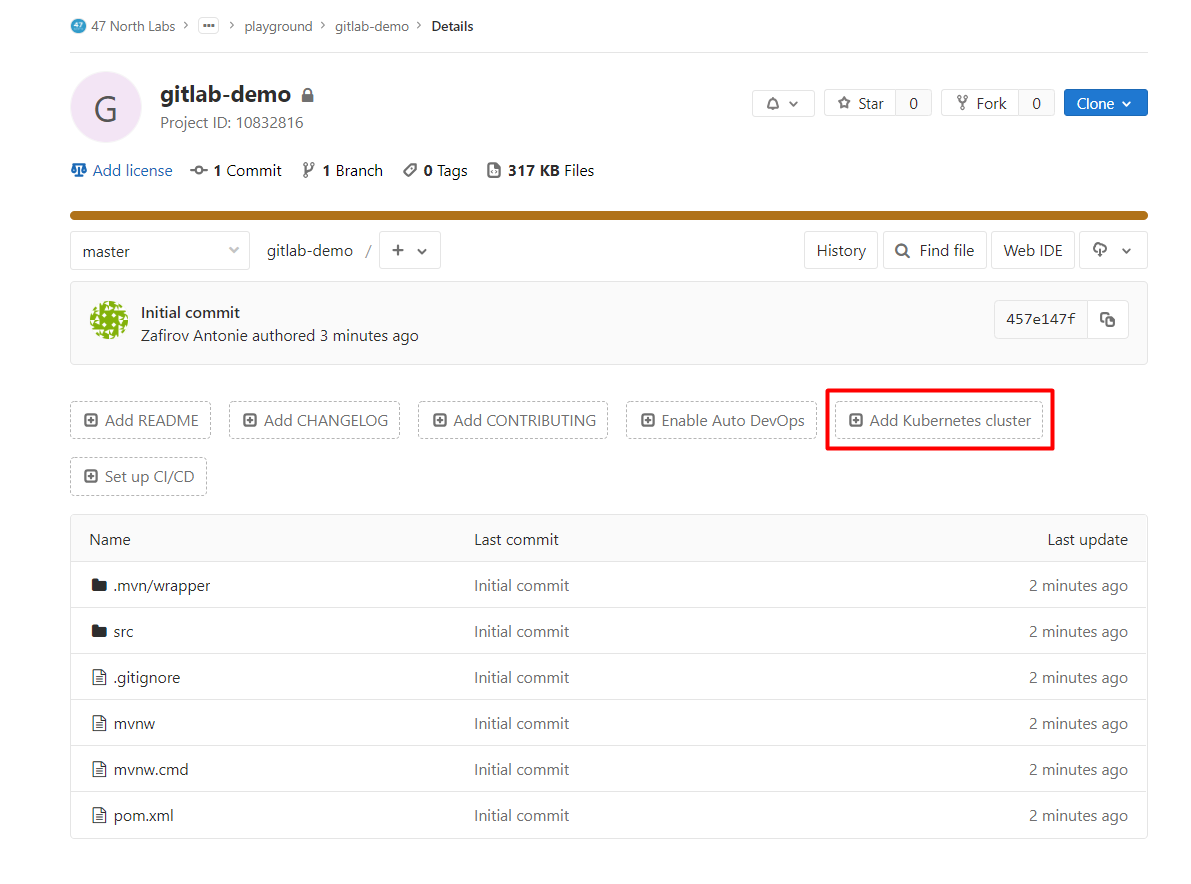
We are done with Google Cloud, so it’s time to set up Kubernetes in our GitLab repository.
- First, we add a Kubernetes cluster.
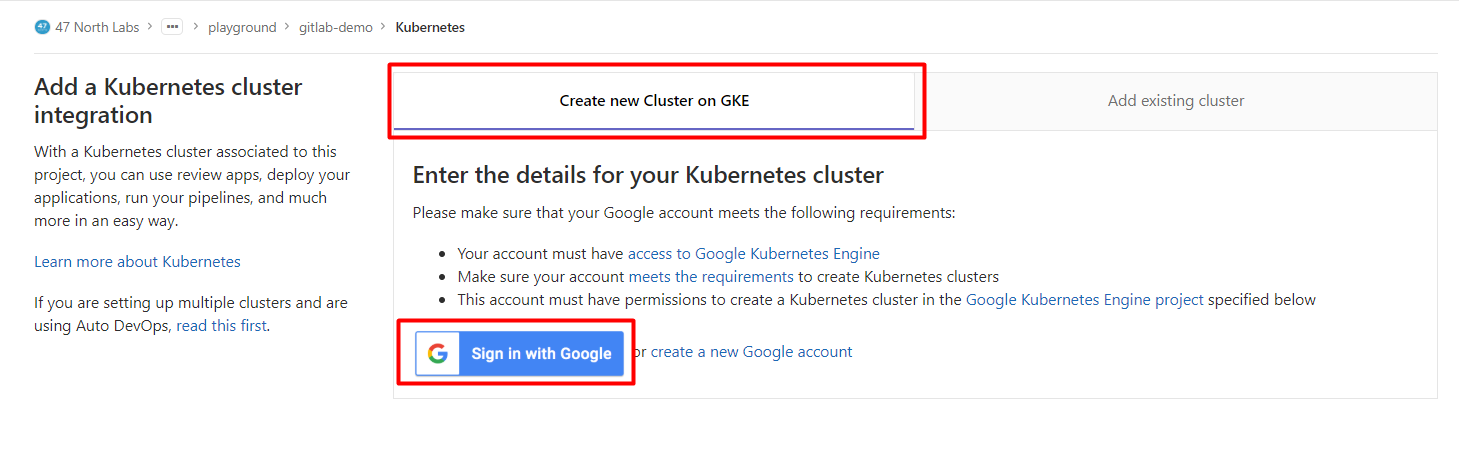
- Next, we give a name to the cluster and select a project from our Google Cloud account: in my case it’s
gitlab -demo.
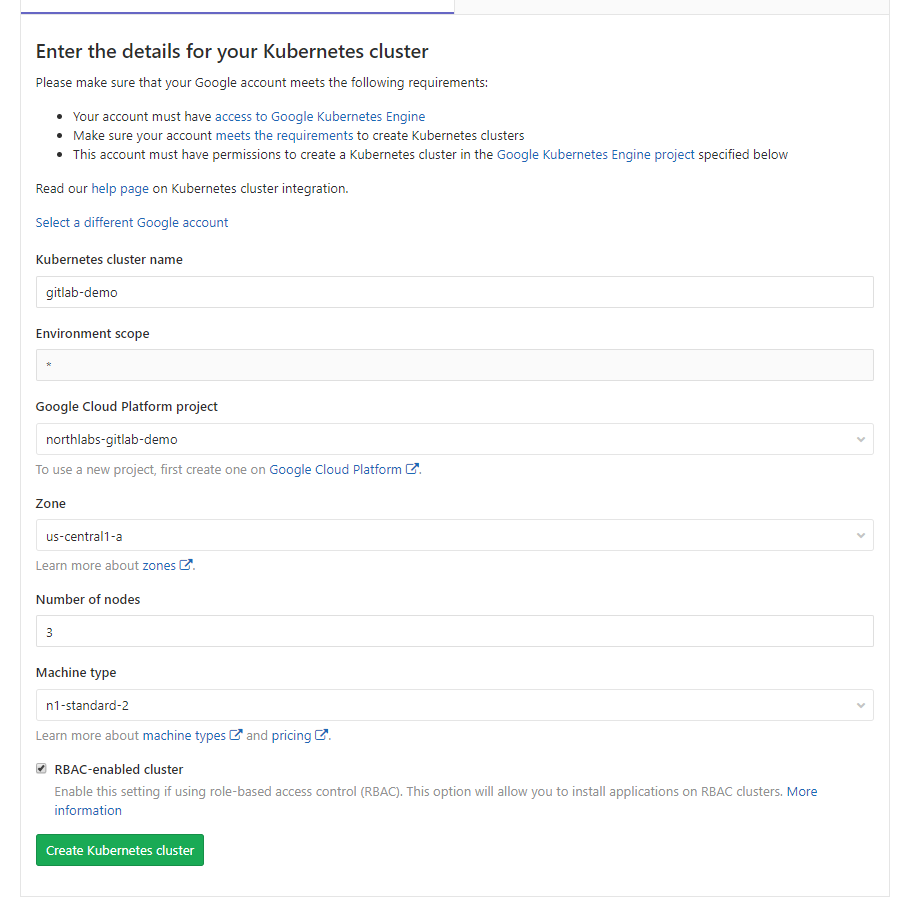
- The base domain name should be set up.

- Installing Helm Tiller is required, and installing other applications is optional (I installed Ingress, Cert-Manager, Prometheus, and GitLab Runner).
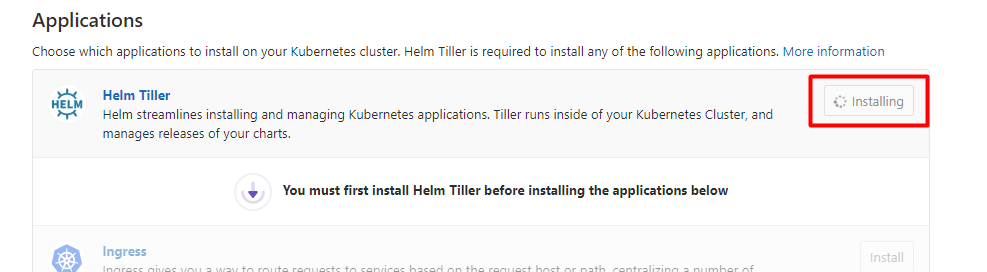
Install Helm Tiller
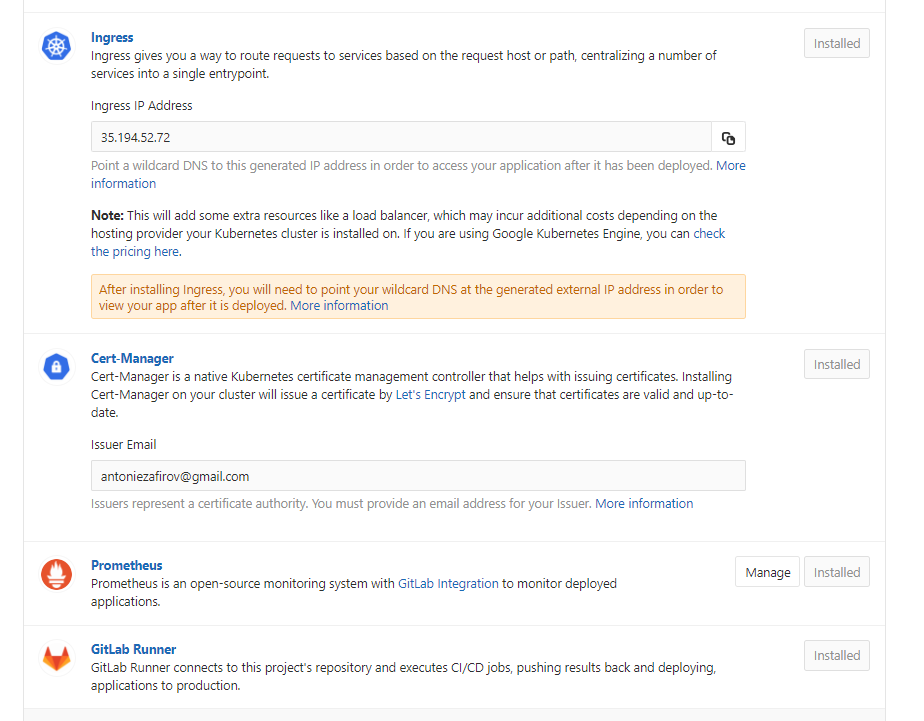
Installed Ingress, Cert-Manager, Prometheus, and GitLab Runner
After installing the applications it’s IMPORTANT to update your DNS settings. Ingress IP address should be copied and added to your DNS configuration.
In my case, it looks like this:

We are almost done. 🙂
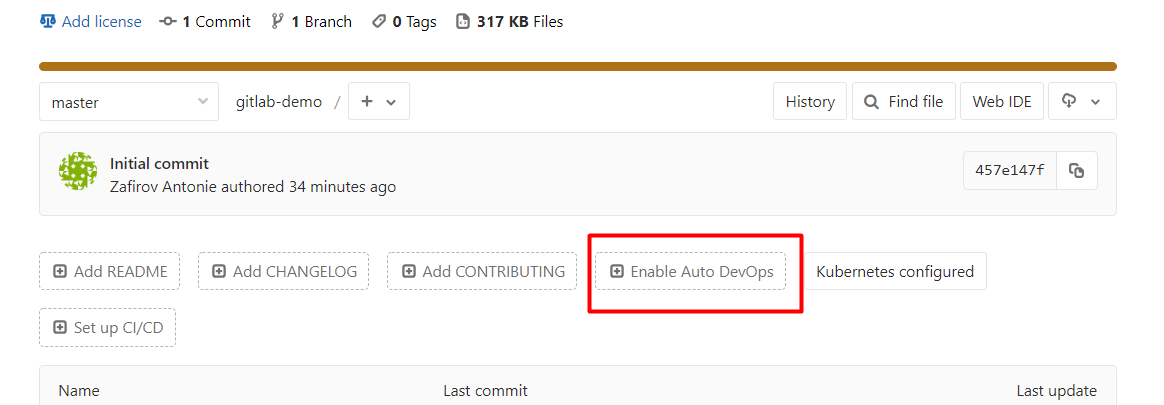
- The last thing that should be done is to enable Auto DevOps.
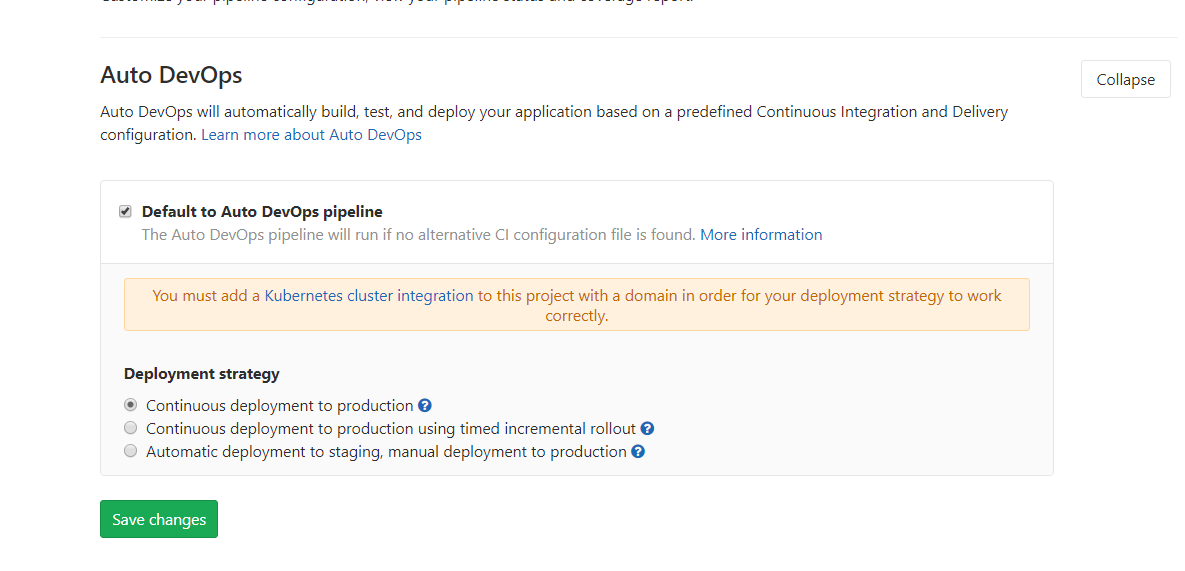
- And to set up Auto DevOps.
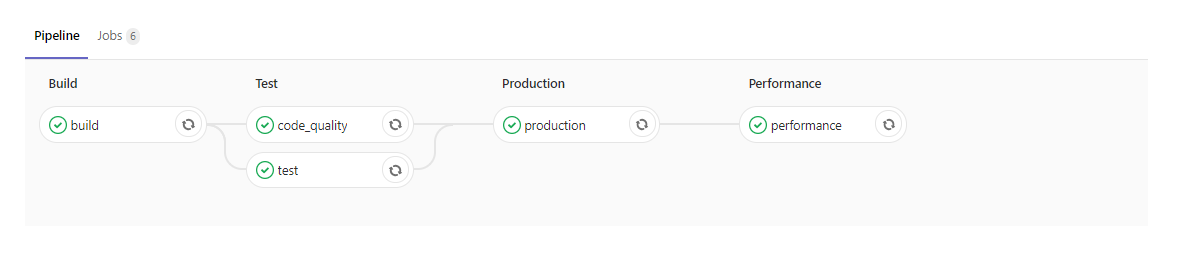
Now take your coffee and watch your pipelines. 🙂
After a couple of minutes your pipeline will finish and will look like this:
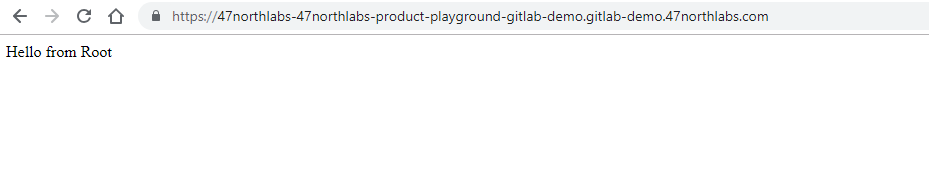
Now open the production pipeline and in the log, under notes section, check the URL of the application. In my case that is:
Application should be accessible at: http://47northlabs-47northlabs-product-playground-gitlab-demo.gitlab-demo.north-47.comOpen the URL in browser or postman.

- Let’s edit our code and push it to GitLab repository.
package com.northlabs.gitlabdemo.rest;

import org.springframework.web.bind.annotation.GetMapping;
import org.springframework.web.bind.annotation.RestController;

@RestController
public class RootController {

    @GetMapping(value = "/")
    public String root() {
        return "Hello from Root v1";
    }

    @GetMapping(value = "/demo")
    public String demo() {
        return "Hello from Demo v1";
    }
}
After the job is finished, if you check the same URL, you will see that the values are now changed.

https://47northlabs-47northlabs-product-playground-gitlab-demo.gitlab-demo.north-47.com

https://47northlabs-47northlabs-product-playground-gitlab-demo.gitlab-demo.north-47.com/demo
And we are done !!!

This is just a basic implementation of the GitLab Auto DevOps. In some of the next


LIKE !!!