What’s great about Node.js is the huge economy of useful packages. For example, AdminBro is a package for creating admin interfaces that can be plugged into your application.
You provide database models or schemas (like blog posts, user comments, etc.) and AdminBro generates the user interface for you. You can manage content through this user interface and talk straight to your database.
What is AdminBro?
AdminBro is an open-source package from Software Brothers that adds an auto-generated admin panel to your Node.js application.
You can connect your various databases to the admin interface and perform standard CRUD operations (create, read, update, delete) on the records. This greatly simplifies and extends your ability to find, monitor, and update your app data across multiple sources.
Creating the admin panel
First of all, we need to create a new folder that will hold our app. Then we will open the terminal in that folder and run:
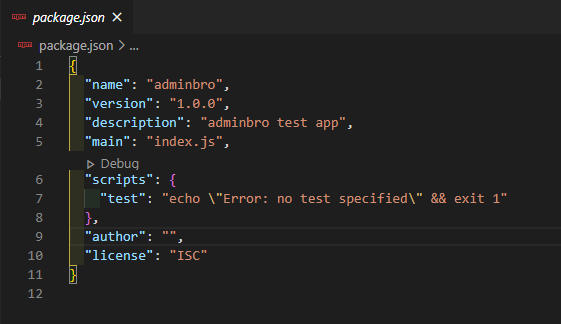
npm init
Go through all the steps and initialize the Node.js application and a package.json -file will be created:
Then, we need to install some dependencies express and the express-formidable packages. express-formidable is a peer dependency for AdminBro:
npm install express express-formidable
Then we can install the AdminBro and the AdminBro express plug-in:
npm install admin-bro @admin-bro/express
Now we will create a new file index.js and inside we can create an express router that will handle all AdminBro routes:
const AdminBro = require('admin-bro')
const AdminBroExpress = require('@admin-bro/express')

const express = require('express')
const app = express()

const adminBro = new AdminBro ({
    Databases: [],
    rootPath: ‘/admin’,
})

const router = AdminBroExpress.buildRouter (adminBro)
The next step is to set up the router as middleware using the Express.js app object:
app.use(adminBro.options.rootPath, router)

app.listen(3000, ()=> {
  console.log('Application is up and running under localhost:3000/admin')
})
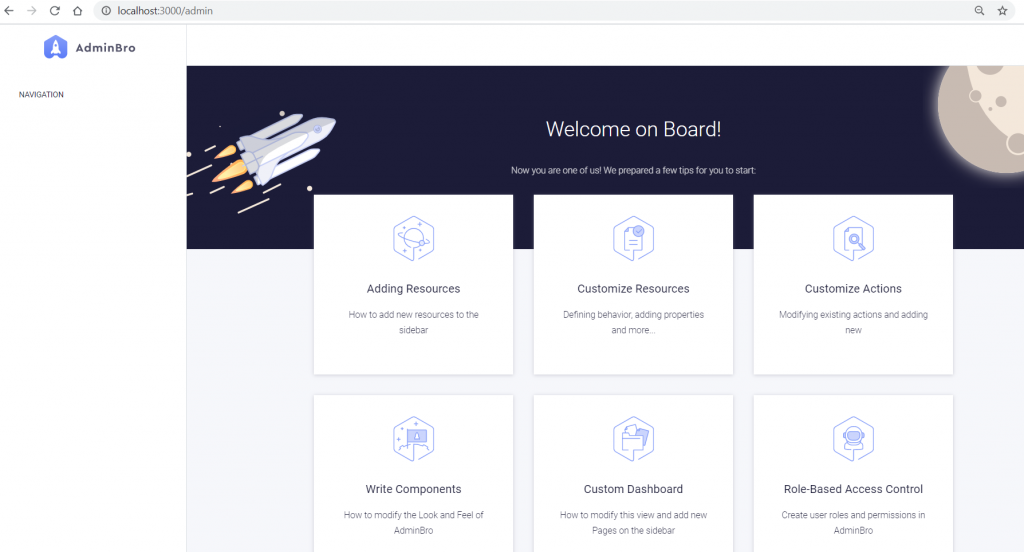
And that’s it! You successfully set up the dashboard! Run:
node index.js
And go ahead and head over to the http://localhost:3000/admin path. The dashboard should be ready and working.
Installing the Database Adapter and Adding Resources
AdminBro can be connected to many different types of resources. Right now, they support the following options:
To add resources to AdminBro, you first have to register an adapter for the resource you want to use. Let’s go with the mongoose solution for now and install the required dependencies:
npm install mongoose @admin-bro/mongoose
Then we register the adapter so that it can be used in our project:
const AdminBroMongoose = require('@admin-bro/mongoose')

AdminBro.registerAdapter(AdminBroMongoose)
Now we can make a connection to the database and pass the resources:
const mongoose = require('mongoose')

const connection = await mongoose.connect('mongodb://localhost:27017/users', {useNewUrlParser: true, useUnifiedTopology: true})

const User = mongoose.model('User', { name: String, email: String, surname: String })

const adminBro = new AdminBro ({
  Databases: [connection],
  rootPath: '/admin',
  resources: [User]
})
Finishing up
Now let’s put all together and our index.js should look like this:
const AdminBro = require('admin-bro')
const AdminBroExpress = require('@admin-bro/express')
const AdminBroMongoose = require('@admin-bro/mongoose')

const express = require('express')
const app = express()

const mongoose = require('mongoose')

AdminBro.registerAdapter(AdminBroMongoose)

const run = async () => {
  const connection = await mongoose.connect('mongodb://localhost:27017/users', {useNewUrlParser: true, useUnifiedTopology: true})

  const User = mongoose.model('User', { name: String, email: String, surname: String })

  const adminBro = new AdminBro ({
    Databases: [connection],
    rootPath: '/admin',
    resources: [User]
  })
  const router = AdminBroExpress.buildRouter(adminBro)
  app.use(adminBro.options.rootPath, router)

  app.listen(3000, ()=> {
    console.log('Application is up and running under localhost:3000/admin')
  })
}

run()
At this point, we have basically built the admin interface. To verify that we have done everything correctly, first make sure your database is up and then re-run the server:
node index.js
Go to http://localhost:3000/admin and on the left side you can see your first model:

Summary
These are the basic steps to create an admin panel from scratch with Node.js and AdminBro. You can go deeper, you can customize your panel resources and widgets, add validation to the fields, configure role-based access control and much more. Any questions? You can check out the AdminBro docs for more details.