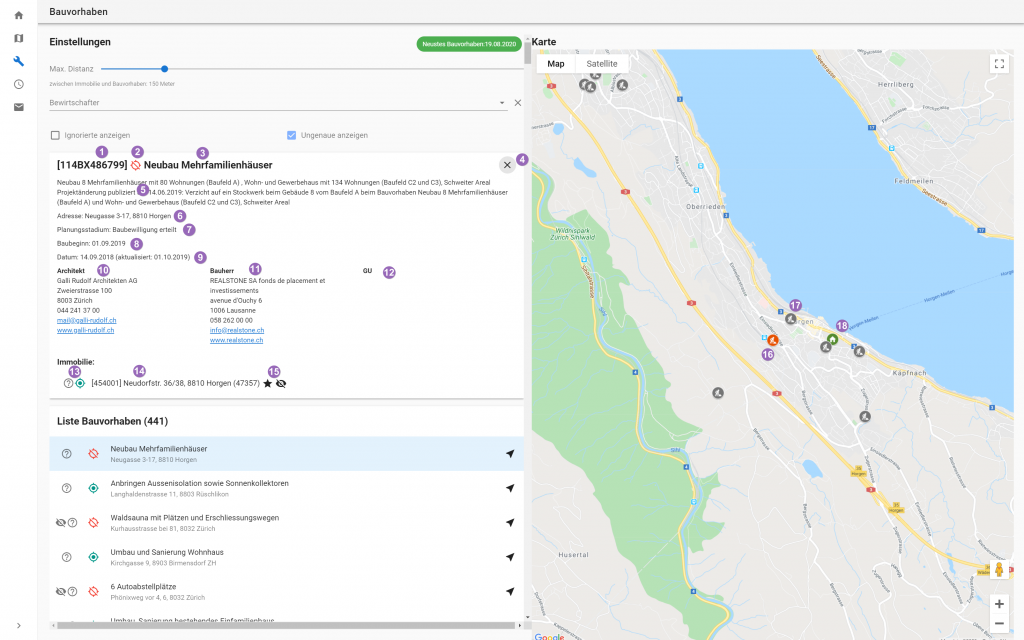
N47 implemented a set of back-office web applications for Prestige, a real estate management company located in Zurich, Switzerland. One application is a tool for displaying construction projects nearby properties managed by Prestige and a second example is a tool for creating and assigning orders to craftsmen. But the following examples aren’t specific for those use cases.
An Overview
The project entails one frontend application with multiple microservices whereby each service has its own database schema.
The application consumes data from Prestige’s main ERP system Abacus and third-party applications.
N47 is responsible for setting up and maintaining the full Kubernetes stack, MySQL Database, Azure Application Gateway and Azure Active Directory applications.
Another company is responsible for the networking and the Abacus part.

Involved Technologies
Our application uses following technologies:
- Database: MySQL 8
- Microservices: Java 11, Spring Boot 2.3, Flyway for database schema updates
- Frontend: Vue.js 2.5 and Vuetify 2.3
- API Gateway: ngix
The CI/CD technology stack includes:
- Source code: BitBucket (Git)
- Pipelines: BitBucket Pipelines
- Static code analysis: SonarCloud
- Infrastructure: Terraform
- Cloud provider: Azure
We’ll focus on the second list of technologies.
Infrastructure as Code (IaC) with Terraform and BitBucket Pipelines
One thing I really like when using IaC is having the definition of the involved services and resources of the whole project in source code. That enables us to track the changes over time in the Git log and of course, it makes it far easier to set up a stage and deploy safely to production.
Please read more about Terraform in our blog post Build your own Cloud Infrastructure using Terraform. The Terraform website is of course as well a good resource.
Storage of Terraform State
One important thing when dealing with Terraform is storing the state in an appropriate place. We’ve chosen to create an Azure Storage Account and use Azure Blob Storage like this:
terraform {
  backend azurerm {
    storage_account_name = "prestigetoolsterraform"
    container_name = "prestige-tools-dev-tfstate"
    key = "prestige-tools-dev"
  }
}
The required access_key is passed as an argument to terraform within the pipeline (more details later). You can find more details in the official tutorial Store Terraform state in Azure Storage by Microsoft.
Another important point is not to run pipelines in parallel, as this could result in conflicts with locks.
Used Terraform Resources
We provide the needed resources on Azure via BitBucket + Terraform. Selection of important resources:
- Resources of provider azurerm:
- Resources of provider azuread:
- Resources of provider kubernetes:
Structure of Terraform Project
We created an entry point for each stage (local, dev, test and prod) which is relatively small and mainly aggregate to the modules with some environment-specific configurations.
The configurations, credentials and other data are stored as variables in the BitBucket pipelines.
/environments
  /local
  /dev
  /test
  /prod
/modules
  /azure_active_directory
  /azure_application_gateway
  /azure_aplication_insights
    /_variables.tf
    /_output.tf
    /main.tf
  /azure_mysql
  /azure_kubernetes_cluster
  /...
The modules themselves have always a file _variables.tf, main.tf and _output.tf to have a clean separation of input, logic and output.
Example source code of the azure_aplication_insights module (please note that some of the text have been shortened in order to have enough space to display it properly)
_variables.tf
variable "name" {
  type = string
}

variable "location" {
  type = string
}

variable "resource_group_name" {
  type = string
}
main.tf
resource "azurerm_application_insights" "ai" {
  name                = var.name
  location            = var.location
  resource_group_name = var.resource_group_name
  application_type    = "web"
}
_output.tf
output "instrumentation_key" {
  value = azurerm_application_insights.ai.instrumentation_key
}
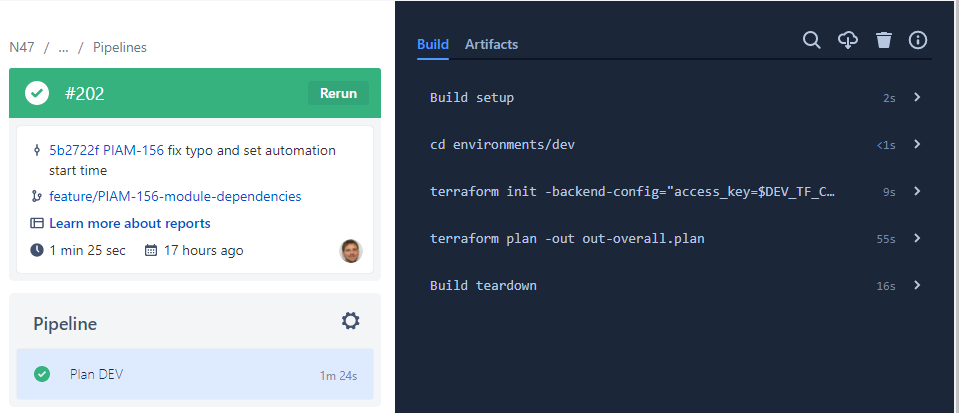
BitBucket Pipeline
The BitBucket pipeline controls Terraform and includes the init, plan and apply. We decided to manually apply the changes in the infrastructure in the beginning.
image: hashicorp/terraform:0.12.26

pipelines:
  default:
      - step:
        name: Plan DEV
        script:
          - cd environments/dev
          - terraform init -backend-config="access_key=$DEV_TF_CONFIG_ACCESS_KEY"
          - terraform plan -out out-overall.plan
        artifacts:
          - environments/dev/out-overall.plan

  branches:
    develop:
      - step:
        name: Plan DEV
        script:
          - cd environments/dev
          - terraform init -backend-config="access_key=$DEV_TF_CONFIG_ACCESS_KEY"
          - terraform plan -out out-overall.plan
        artifacts:
          - environments/dev/out-overall.plan
          - environments/dev/.terraform/**
      - step:
        name: Apply DEV
        trigger: manual
        deployment: dev
        script:
          - cd environments/dev
          - terraform apply out-overall.plan

    master:
      # PRESTIGE TEST
      - step:
          name: Plan TEST
          script:
            - cd environments/test
            - terraform init -backend-config="access_key=$PRESTIGE_TF_CONFIG_ACCESS_KEY"
            - terraform plan -out out-overall.plan
          artifacts:
            - environments/test/out-overall.plan
            - environments/test/.terraform/**
      - step:
          name: Apply TEST
          trigger: manual
          deployment: test
          script:
            - cd environments/test
            - terraform apply out-overall.plan

      # PRESTIGE PROD ...
Needed Steps for Deploying to Production
1. Create feature branch with some changes
2. Push to Git (BitBucket pipeline with step Plan DEV will run). All the details about the changes can be found in the Terraform plan command
3. Create a pull request and merge the feature branch into develop. This will start another pipeline with the two steps (plan + apply)
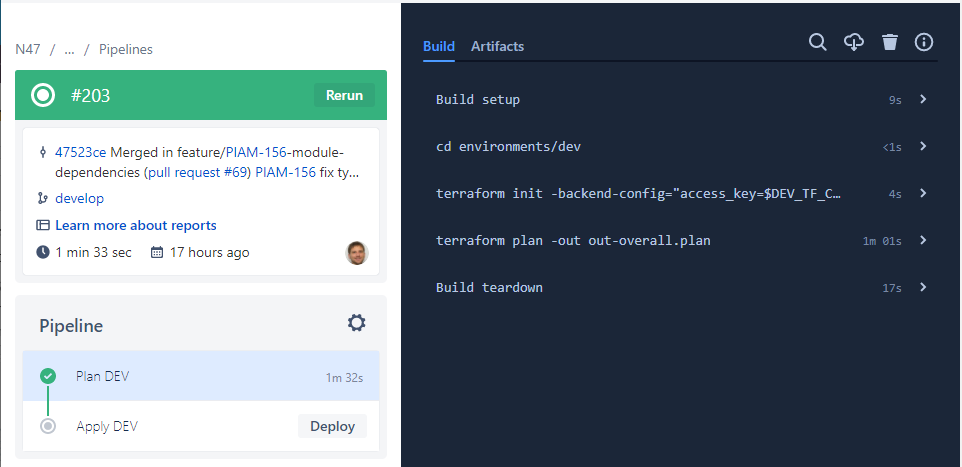
4. Check the output of the plan step before triggering the deploy on dev
5. Now the dev stage is updated and if everything is working as you wish, create another pull request to merge from develop to master. And re-do the same for the production of other stages
We have just deployed an infrastructure change to production without logging into any system except BitBucket. Time for celebration.

Is Really Everything That Shiny?
Well, everything is a big word.
We found issues, for example with cross-module dependencies, which aren’t just solvable with a depends_on. Luckily, there are some alternatives:
network module:
output "id" {
  description = "The Azure assigned ID generated after the Virtual Network resource is created and available."
  value = azurerm_virtual_network.virtual_network.id
}
kubernetes cluster module, which depends on network:
variable "subnet_depends_on" {
  description = "Variable to force module to wait for the Virtual Network creation to finish"
}
and the usage of those two modules in environments/dev/main.tf
module "network" {
  source = "../../modules/azure_network"
}

module "kubernetes_cluster" {
  source = "../../modules/azure_kubernetes_cluster"
  subnet_depends_on = module.network.id
}
After having things set up, it really makes joy to wipe out a stage and just provision everything from scratch with running a BitBucket pipeline.