In this tutorial, I will try to explain step by step, how you can set up Kubernetes, deploy your microservice on Kubernetes, and check the result via the Kubernetes dashboard. All other things will be “as simple as possible”. As a cloud platform gcloud will be used. We will cover the following aspects of the problem:
- Create microservice to be deployed
- Placed application in your docker container
- What is Kubernetes and how to install it?
- Create a new Kubernetes project
- Create new Cluster
- Allow access from your local machine
- Create service account
- Activate service account
- Connect to cluster
- Gcloud initialization
- Generate access token
- Deploy and start Kubernetes dashboard
- Deploy microservice
Step 1: Create microservice to be deployed
Traditionally, in the programming world, everything starts with “Hello World”. So, as mentioned previously, to keep things simple, create a microservice that returns just “Hello World”. You can use https://start.spring.io/ for this goal. Create HelloController like this:
package com.example.demojooq.controllers;


import org.springframework.web.bind.annotation.GetMapping;
import org.springframework.web.bind.annotation.RequestMapping;
import org.springframework.web.bind.annotation.RestController;

@RestController
@RequestMapping("/api/v1")
public class HelloController {

    @GetMapping("/say-hello")
    public String sayHello() {
        return "Hello world";
    }
}
Step 2: Placed application in your docker container
We have a microservice, need to put this microservice in a docker container and upload it on Kubernetes. From that point, Kubernetes will orchestrate the container according to your settings. Let’s create the first image from the microservice. Normally, as you might guess, it is called Dockerfile (without any extension), and the content is:
Dockerfile
FROM adoptopenjdk/openjdk11:jre-11.0.8_10-debianslim
ARG JAR_FILE=target/*.jar
COPY ${JAR_FILE} app.jar
ENTRYPOINT ["java","-jar","app.jar"]
The next step is to create the docker-compose file. For that purpose, a call to Dockerfile will be made to build the image. You can do it manually, but the best way is from the docker-compose file, as you have a permanent track of the solution. This is a .yaml file. (picture below)
docker-compose.yaml
version: "3"
services:
  hello-world:
    build: .
    ports:
      - "8099:8080"
After starting docker, go to the folder where docker-compose is located and execute the command “docker-compose up”. The expectation is to reach this microservice on 8099 port. If everything is ok, in your docker will be something like this:

Check microservice docker installation with postman calling http://localhost:8099/api/v1/say-hello. In response, you have “Hello World”.
Step 3: What is Kubernetes and how to install it?
What is Kubernetes?
Kubernetes is an open-source container orchestrator that automates many tasks involved in deploying, managing, and scaling containerized applications. What happens when you use Docker, and your container fails? Probably the first thing to do is to restart your container. You do that manually (if you don’t have Kubernetes). Here comes Kubernetes, observe that container is down and start new container automatically. This is just a basic use case. Please read more on the internet, there is a bunch of information about this.
How to install Kubernetes?
Ok, until now you are sure that Kubernetes is needed, but where to find it, what are the costs, and how to install it? First of all, try “download Kubernetes” on Google… Pick the site https://kubernetes.io/docs/tasks/tools/… Options for Windows, Mac, Linux appear… A different installation like kind, minikube, kubeadmin… So, is it worth spending so much time setting properly this Kubernetes? You do not have to ask me, I agree with you, it is too much time. Fortunately, we can make a “go around” and skip all that: Go to Gcloud where Kubernetes is offered as a service and just use it. Somebody else takes care of this, we can focus just on the business logic in our microservice and use out-of-the-box Kubernetes installation from Gcloud. Sounds good, doesn’t it? The last and most important question; money. Is it for free? No, it is not. You have to pay for the Gcloud services and here is the price list: https://cloud.google.com/kubernetes-engine/pricing. But for ordinary people like you and me, Gcloud offers a free account for 3 months up to 300$ and it seems fair. It is enough time to learn about deploying microservices on Kubernetes. For any professional use in future, the company should stay behind this. Here is the link where you can create your free cloud account https://cloud.google.com/. One more thing, during the creation of a free account, Google will ask for your bank account, to automatically charge you. But do not worry, you are safe for the first three months and below 300$. And for any charging, you will be asked for permission before… So, until now my personal experience is positive, as Google is keeping the promise when you create an account. But the final decision is up to you.
Step 4: Create new Kubernetes project
Open up your Google account, sign in and go to the console.
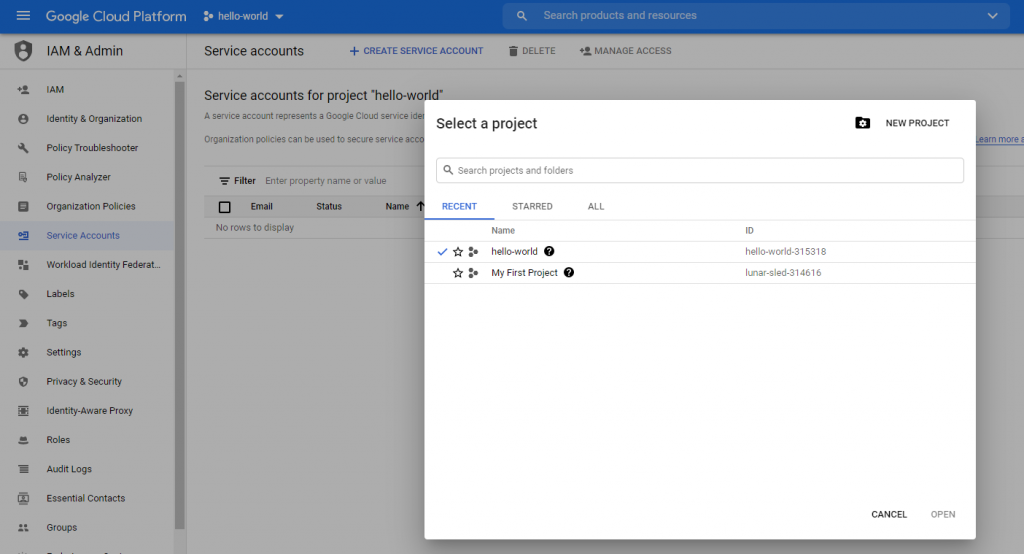
Create a new project from the main dashboard; the name of the new project is “hello-world”. From now on, this is your active project.
Step 5: Create new cluster
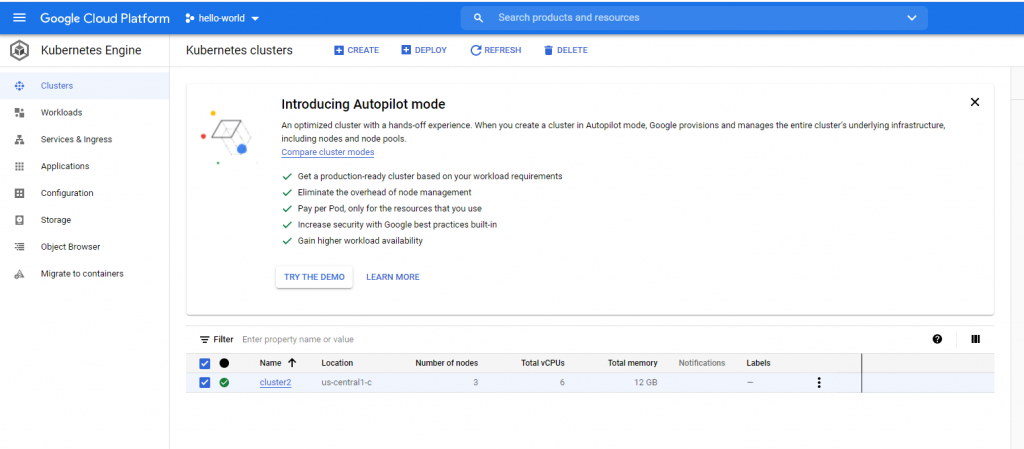
Create new cluster (named it cluster2). Accept default values for others fields.
Step 6: Allow access from your local machine
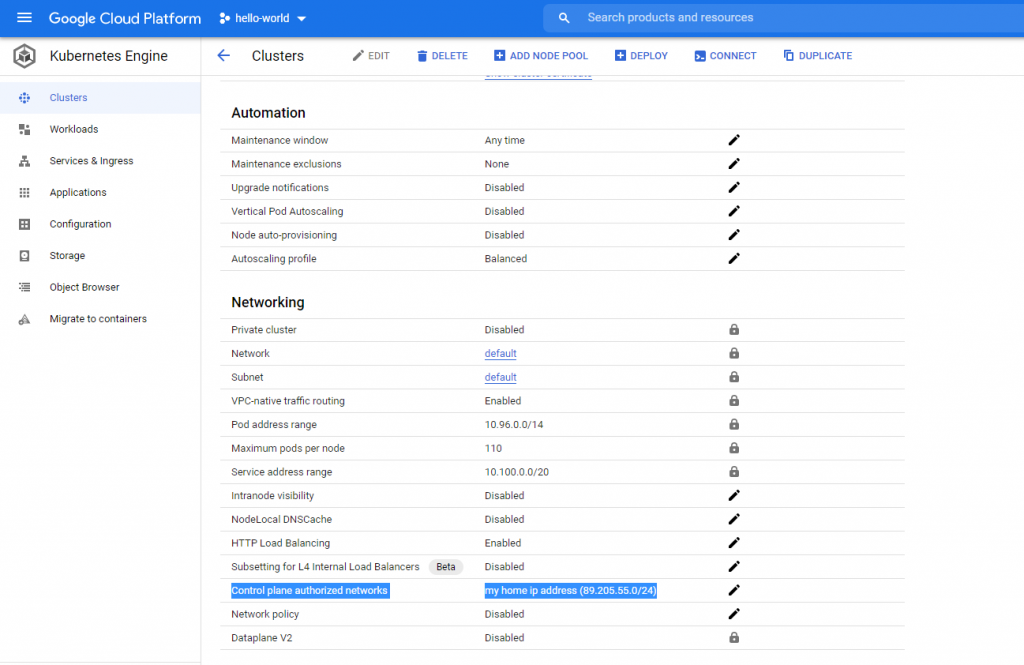
Now, we must allow access from our local machine to Kubernetes, via kubectl. For that purpose, we need to follow these steps:
- Click on cluster2
- Find your local IP address and add it here according to the CIDR standard in the Edit control plane authorized networks
Step 7: Create service account
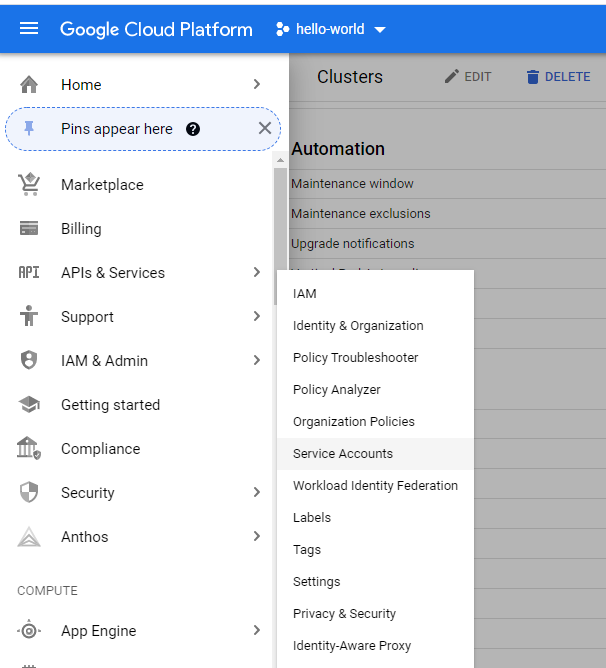
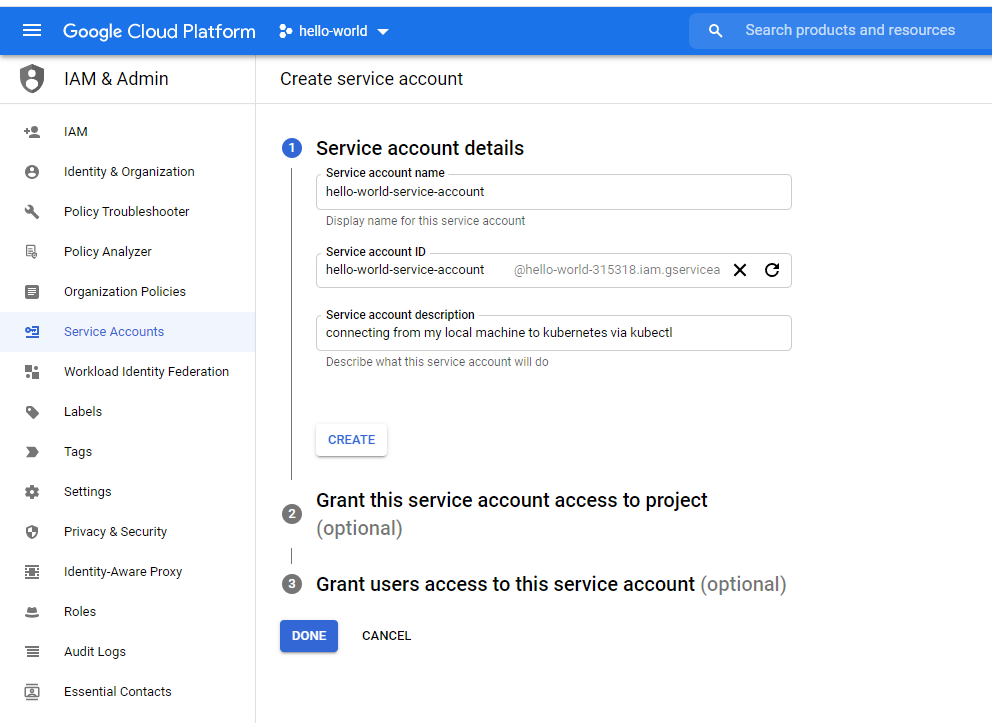
Give new account role “Owner”. Accept default values for other fields. After a service account is created, you should have something like this:

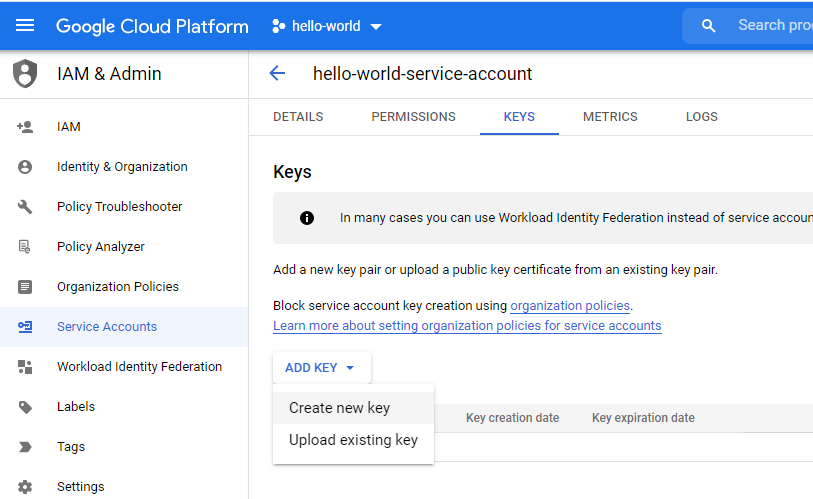
Generate keys for this service account with key type JSON. When the key is downloaded, it has some random name like hello-world-315318-ab0c74d58a70.json. Keep this file in a safe place, we will need it later.
Now, install Google Cloud SDK Shell on your machine according to your OS. Let’s do the configuration so kubectl can reach cluster2. Copy the file hello-world-315318-ab0c74d58a70.json and put it in the CLOUD SDK folder. For the Windows environment, it looks like this:

Step 8: Activate service account
The first thing to do is to activate the service account with the command: gcloud auth activate-service-account hello-world-service-account@hello-world-315318.iam.gserviceaccount.com –key-file=hello-world-315318-ab0c74d58a70.json

Step 9: Connect to cluster
Now go to cluster2 again and find the connection string to connect to the new cluster
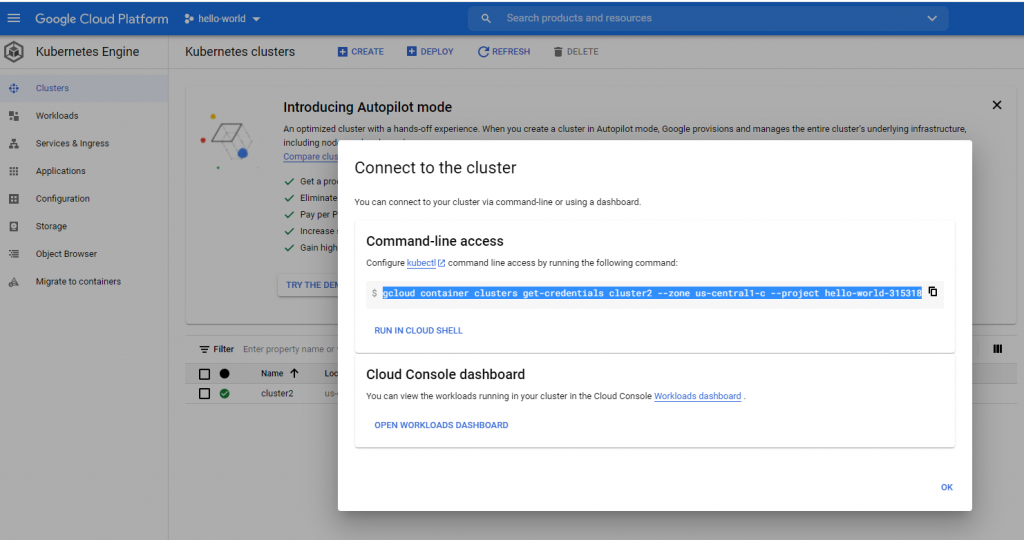
Execute this connection string in Google Cloud Shell: gcloud container clusters get-credentials cluster2 –zone us-central1-c –project hello-world-315318

Step 10: Gcloud initialization
The next command to execute is gcloud init, to initialize connection with the new project. Here is the complete code on how to do that from the Gcloud Shell:
C:\Users\Dimche Trifunov\AppData\Local\Google\Cloud SDK>gcloud init
Welcome! This command will take you through the configuration of gcloud.

Settings from your current configuration [dev] are:
accessibility:
  screen_reader: 'False'
compute:
  region: europe-west3
  zone: europe-west3-a
core:
  account: hello-world-service-account@hello-world-315318.iam.gserviceaccount.com
  disable_usage_reporting: 'True'
  project: dops-containers

Pick configuration to use:
 [1] Re-initialize this configuration [dev] with new settings
 [2] Create a new configuration
 [3] Switch to and re-initialize existing configuration: [database-connection]
 [4] Switch to and re-initialize existing configuration: [default]
Please enter your numeric choice:  2

Enter configuration name. Names start with a lower case letter and
contain only lower case letters a-z, digits 0-9, and hyphens '-':  hello-world
Your current configuration has been set to: [hello-world]

You can skip diagnostics next time by using the following flag:
  gcloud init --skip-diagnostics

Network diagnostic detects and fixes local network connection issues.
Checking network connection...done.
Reachability Check passed.
Network diagnostic passed (1/1 checks passed).

Choose the account you would like to use to perform operations for
this configuration:
 [1] cicd-worker@devops-platform-n47.iam.gserviceaccount.com
 [2] d.trifunov74@gmail.com
 [3] dimche.trifunov@north-47.com
 [4] dtrifunov@lunar-sled-314616.iam.gserviceaccount.com
 [5] hello-world-service-account@hello-world-315318.iam.gserviceaccount.com
 [6] service-account-demo-dime@blissful-epoch-305214.iam.gserviceaccount.com
 [7] Log in with a new account
Please enter your numeric choice:  5

You are logged in as: [hello-world-service-account@hello-world-315318.iam.gserviceaccount.com].

API [cloudresourcemanager.googleapis.com] not enabled on project
[580325979968]. Would you like to enable and retry (this will take a
few minutes)? (y/N)?  y

Enabling service [cloudresourcemanager.googleapis.com] on project [580325979968]...
Operation "operations/acf.p2-580325979968-f1bf2515-deea-49d5-ae35-a0adfef9973e" finished successfully.
Pick cloud project to use:
 [1] hello-world-315318
 [2] Create a new project
Please enter numeric choice or text value (must exactly match list
item):  1

Your current project has been set to: [hello-world-315318].

Do you want to configure a default Compute Region and Zone? (Y/n)?  n

Error creating a default .boto configuration file. Please run [gsutil config -n] if you would like to create this file.
Your Google Cloud SDK is configured and ready to use!

* Commands that require authentication will use hello-world-service-account@hello-world-315318.iam.gserviceaccount.com by default
* Commands will reference project `hello-world-315318` by default
Run `gcloud help config` to learn how to change individual settings

This gcloud configuration is called [hello-world]. You can create additional configurations if you work with multiple accounts and/or projects.
Run `gcloud topic configurations` to learn more.

Some things to try next:

* Run `gcloud --help` to see the Cloud Platform services you can interact with. And run `gcloud help COMMAND` to get help on any gcloud command.
* Run `gcloud topic --help` to learn about advanced features of the SDK like arg files and output formatting
Step 11: Generate access token
Type kubectl get namespace, access token is generated in .kube folder (in home folder), in config file:
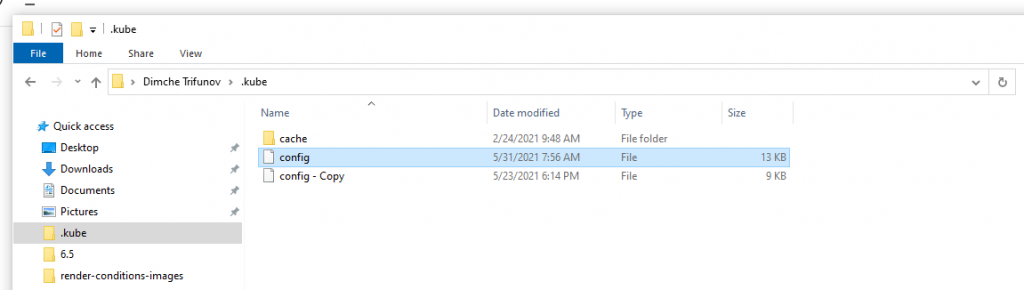
If you open this config file, you will find your access token. You will need this later.
Step 12: Deploy and start Kubernetes dashboard
Now, deploy Kubernetes dashboard with the next command: kubectl apply -f https://raw.githubusercontent.com/kubernetes/dashboard/v2.0.0/aio/deploy/recommended.yaml
C:\Users\Dimche Trifunov\AppData\Local\Google\Cloud SDK>kubectl apply -f https://raw.githubusercontent.com/kubernetes/dashboard/v2.0.0/aio/deploy/recommended.yaml
namespace/kubernetes-dashboard created
serviceaccount/kubernetes-dashboard created
service/kubernetes-dashboard created
secret/kubernetes-dashboard-certs created
secret/kubernetes-dashboard-csrf created
secret/kubernetes-dashboard-key-holder created
configmap/kubernetes-dashboard-settings created
role.rbac.authorization.k8s.io/kubernetes-dashboard created
clusterrole.rbac.authorization.k8s.io/kubernetes-dashboard created
rolebinding.rbac.authorization.k8s.io/kubernetes-dashboard created
clusterrolebinding.rbac.authorization.k8s.io/kubernetes-dashboard created
deployment.apps/kubernetes-dashboard created
service/dashboard-metrics-scraper created
deployment.apps/dashboard-metrics-scraper created

C:\Users\Dimche Trifunov\AppData\Local\Google\Cloud SDK>kubectl proxy
Starting to serve on 127.0.0.1:8001
Start the dashboard with kubectl proxy command. Now open the dashboard from the link: http://localhost:8001/api/v1/namespaces/kubernetes-dashboard/services/https:kubernetes-dashboard:/proxy/#/overview?namespace=default
In front of you, this screen will appear:
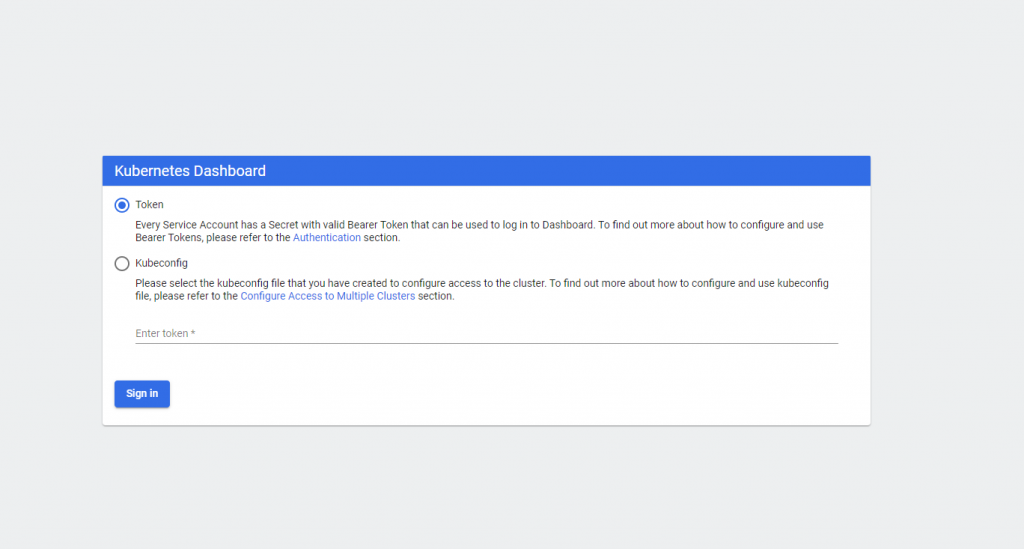
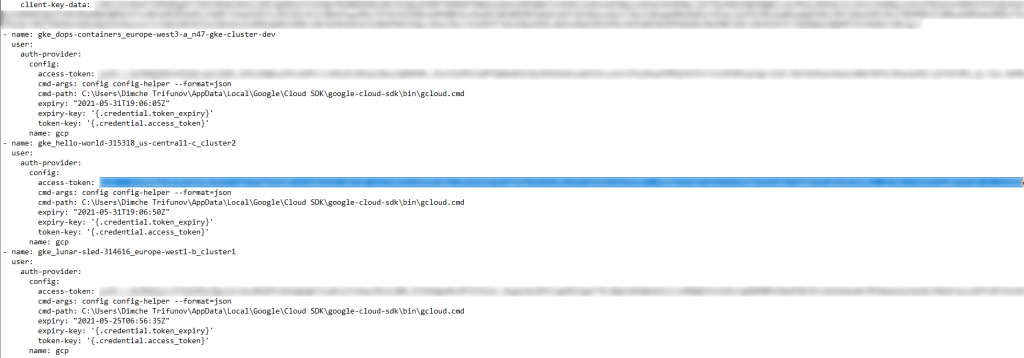
Now, you need the token from the config file that we spoke about a moment ago. Open the config file with Notepad (on Windows), find your access token, and copy from there and paste it in the Enter token* field. Be careful when you are copying token from the config file as there might be several tokens. You must choose yours (image below).
Finally, the stage is prepared to deploy microservice.
Step 13: Deploy microservice
Build the docker image from Dockerfile with the command: docker build -t docker2222/dimac:latest. docker2222/dimac is my public docker repository.
Push the image on docker hub with the command: docker image push docker2222/dimac:latest.
Execute kubectl apply -f k8s.yaml where k8s.yaml is the file below:
---

apiVersion: v1
kind: Namespace
metadata:
  name: hello

---

apiVersion: apps/v1
kind: Deployment
metadata:
  name: hello-world
  namespace: hello
  annotations:
    buildNumber: "1.0"
spec:
  selector:
    matchLabels:
      app: hello-world
  replicas: 1
  template:
    metadata:
      labels:
        app: hello-world
      annotations:
        buildNumber: "1.0"
    spec:
      containers:
        - name: hello-world
          image: docker2222/dimac:latest
          readinessProbe:
            httpGet:
              path: "/actuator/health/readiness"
              port: 8080
            initialDelaySeconds: 5
          ports:
            - containerPort: 8080
          env:
            - name: APPLICATION_VERSION
              value: "1.0"
---


apiVersion: v1
kind: Service
metadata:
  name: hello-world
  namespace: hello
spec:
  selector:
    app: hello-world
  ports:
    - protocol: TCP
      port: 80
      targetPort: 8080
---
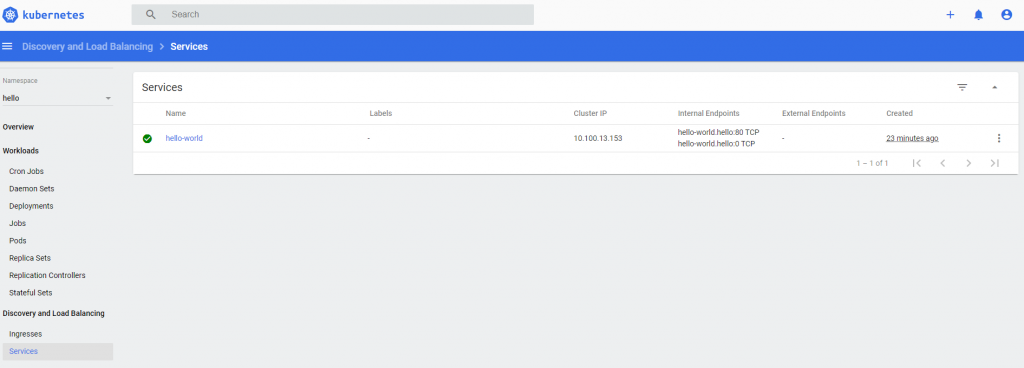
Last but not least, open the Kubernetes dashboard. If everything is OK, you should see your service.