Why should you consider implementing multitenancy in your project?
- Cost: Multi-tenant architecture allows the sharing of resources, databases, and the application itself, thus the cost to run the system is fixed.
- Maintenance: Users do not have to pay a considerable amount of fees to keep the software up to date. This reduces the overall cost of maintenance for each tenant.
- Performance: Easier to assess and optimize speed, utilization, response time across the entire system, and even update the technology stack when needed.
In this blog we will implement multitenancy in our Spring Boot project.
Let’s create a simple Spring Boot project from start.spring.io, with only basic dependencies (Spring Web, Spring Data JPA, Spring Configuration Processor, MySQL Driver).
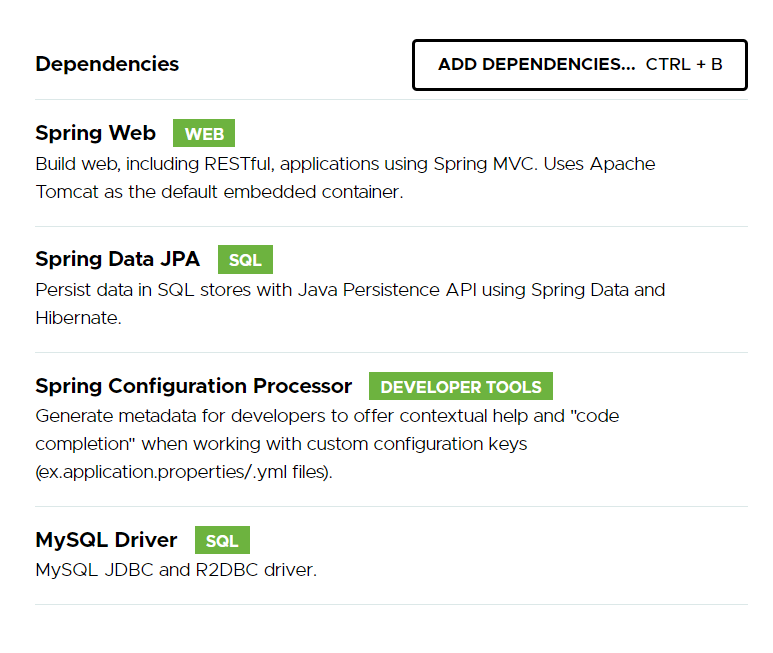
The good thing for implementing multitenancy is that we do not need additional dependencies.
We will split this example into two parts. In the first one, we will explain the idea/logic behind it and split the approach into 7 configuration steps, and explain every step. In the second part, we will see how it’s implemented in real life and we will test the solution.
1. Let’s start with creating Tenant Storage. We will use it for keeping the tenant value while the request is executing.
public class TenantStorage {

    private static ThreadLocal<String> currentTenant = new ThreadLocal<>();

    public static void setCurrentTenant(String tenantId) {
        currentTenant.set(tenantId);
    }

    public static String getCurrentTenant() {
        return currentTenant.get();
    }

    public static void clear() {
        currentTenant.remove();
    }
}
2. Next, we will create the Tenant Interceptor. For every request, we will set the value at the beginning and clear it at the end. As you can see, in Tenant Interceptor, I decided for this demo to fetch the value of the tenant from request header (X-Tenant), this is up to you. Just keep an eye on data security when using this in production. Maybe you want to fetch from a cookie or some other header name.
@Component
public class TenantInterceptor implements WebRequestInterceptor {

    private static final String TENANT_HEADER = "X-Tenant";

    @Override
    public void preHandle(WebRequest request) {
        TenantStorage.setCurrentTenant(request.getHeader(TENANT_HEADER));
    }

    @Override
    public void postHandle(WebRequest webRequest, ModelMap modelMap) {
        TenantStorage.clear();
    }

    @Override
    public void afterCompletion(WebRequest webRequest, Exception e) {

    }
}
3. Next thing is to add the tenant Interceptor in the interceptor registry. For that purpose, I will create WebConfiguration that will implement WebMvcConfigurer.
@Configuration
public class WebConfiguration implements WebMvcConfigurer {

    private final TenantInterceptor tenantInterceptor;

    public WebConfiguration(TenantInterceptor tenantInterceptor) {
        this.tenantInterceptor = tenantInterceptor;
    }

    @Override
    public void addInterceptors(InterceptorRegistry registry) {
        registry.addWebRequestInterceptor(tenantInterceptor);
    }
}
4. Now, let’s update the application.yml file with some properties for the database connections.
tenants:
  datasources:
    n47schema1:
      jdbcUrl: jdbc:mysql://localhost:3306/n47schema1?verifyServerCertificate=false&useSSL=false&requireSSL=false
      driverClassName: com.mysql.cj.jdbc.Driver
      username: root
      password:
    n47schema2:
      jdbcUrl: jdbc:mysql://localhost:3306/n47schema2?verifyServerCertificate=false&useSSL=false&requireSSL=false
      driverClassName: com.mysql.cj.jdbc.Driver
      username: root
      password:
spring:
  jpa:
    database-platform: org.hibernate.dialect.MySQL5Dialect
5. Following, we will wrap the tenant’s values to map with key = tenant name, value = data source in DataSourceProperties.
@ConfigurationProperties(prefix = "tenants")
@Component
public class DataSourceProperties {

    private Map<Object, Object> dataSources = new LinkedHashMap<>();

    public Map<Object, Object> getDataSources() {
        return dataSources;
    }

    public void setDataSources(Map<String, Map<String, String>> datasources) {
        datasources.forEach((key, value) -> this.dataSources.put(key, convert(value)));
    }

    public DataSource convert(Map<String, String> source) {
        return DataSourceBuilder.create()
                .url(source.get("jdbcUrl"))
                .driverClassName(source.get("driverClassName"))
                .username(source.get("username"))
                .password(source.get("password"))
                .build();
    }
}
6. Afterwards, we should create DataSource Bean, and for that purpose, I will create DataSourceConfig.
@Configuration
public class DataSourceConfig {

    private final DataSourceProperties dataSourceProperties;

    public DataSourceConfig(DataSourceProperties dataSourceProperties) {
        this.dataSourceProperties = dataSourceProperties;
    }

    @Bean
    public DataSource dataSource() {
        TenantRoutingDataSource customDataSource = new TenantRoutingDataSource();
        customDataSource.setTargetDataSources(dataSourceProperties.getDataSources());
        return customDataSource;
    }
}
7. At last, we will extend the AbstractRoutingDataSource and implement our lookup key.
public class TenantRoutingDataSource extends AbstractRoutingDataSource {

    @Override
    protected Object determineCurrentLookupKey() {
        return TenantStorage.getCurrentTenant();
    }

}
And we are done with the first part.
Let’s see how it looks in the real world:
For this example, we will use two schemas from the same database instance, we will create a user and get all users. Also, I will show you how you can implement Flyway and test the solution.
First, let’s configure our databases. In my local instance of MySQL server, we will create two schemas: n47schema1 and n47schema2.
Next step is to execute this CREATE statement on both schemas:
CREATE TABLE `users` (
	`id` INT(11) NOT NULL AUTO_INCREMENT,
	`name` VARCHAR(64) NOT NULL DEFAULT '' COLLATE 'utf8_general_ci',
	PRIMARY KEY (`id`)
);
Then, we will create two APIs, one for creating a user, and the other one to fetch all users.
@RestController
@RequestMapping("/users")
public class UserController {

    private final UserRepository userRepository;

    public UserController(UserRepository userRepository) {
        this.userRepository = userRepository;
    }

    @PostMapping
    public UserDomain addUser(@RequestBody UserRequestBody userRequestBody) {
        UserDomain userDomain = new UserDomain(userRequestBody.getName());
        return userRepository.save(userDomain);
    }

    @GetMapping
    public List<UserDomain> getAll() {
        return userRepository.findAll();
    }
}
Also we need to create UserDomain, UserRepository and UserRequestBody.
@Entity
@Table(name = "users")
public class UserDomain {

    @Id
    @GeneratedValue(strategy = GenerationType.IDENTITY)
    private Long id;

    private String name;

    public UserDomain() {
    }

    public UserDomain(String name) {
        this.name = name;
    }

    public Long getId() {
        return id;
    }

    public void setId(Long id) {
        this.id = id;
    }

    public String getName() {
        return name;
    }

    public void setName(String name) {
        this.name = name;
    }
}
public interface UserRepository extends JpaRepository<UserDomain, Long> {
}
public class UserRequestBody {
    private String name;

    public UserRequestBody() {
    }

    public UserRequestBody(String name) {
        this.name = name;
    }

    public String getName() {
        return name;
    }

    public void setName(String name) {
        this.name = name;
    }
}
And we are done with coding.
We can run our application and start making a request.
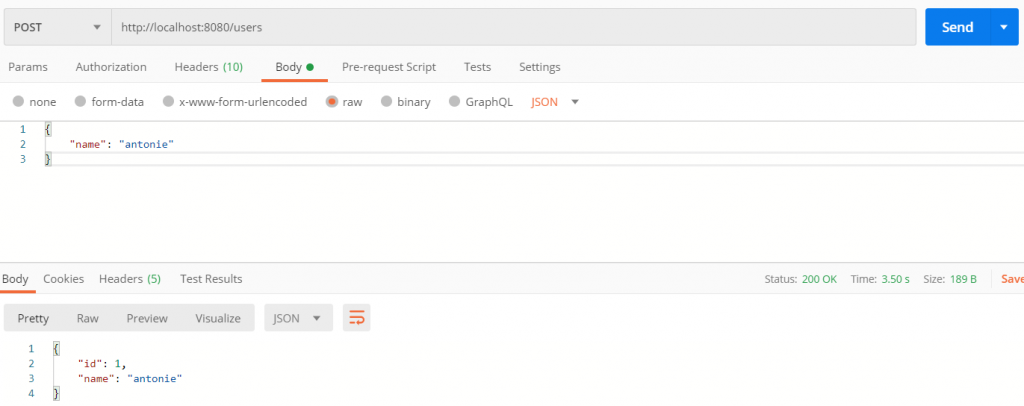
First, let’s create some users with a POST request to http://localhost:8080/users. The most important thing not to forget is that we need to provide header X-Tenant with the value n47schema1 or n47schema2.

We will create two users for tenant n47schema1: Antonie and John. Example:
After that, we will change the X-Tenant header value to n47schema2 and create two users: William and Joseph.
You will notice that the ids retrieved in the response are the same as the first tenant value. Now let’s fetch the users by the API.
When you make a GET request to http://localhost:8080/users with header X-Tenant having value n47schema1 you will fetch the users from the n47schema1 schema, and when you make a request with a header value n47schema2 you will fetch from the n47schema2 schema.
You can also check the data in the database to be sure that it is stored correctly.
You can always set fallback if the X-Tenant header is not provided, or it’s with a wrong value.
As the last thing, I will show you how you can implement Flyway with multitenancy. First, you need to add flyway as a dependency and disable it in the application.yml
spring:
  flyway:
    enabled: false
Add PostConstruct method in DataSourceConfig configuration:
@PostConstruct
public void migrate() {
        for (Object dataSource : dataSourceProperties.getDataSources().values()) {
            DataSource source = (DataSource) dataSource;
            Flyway flyway = Flyway.configure().dataSource(source).load();
            flyway.migrate();
        }
}
And we are done, hope this blog helps you to understand what multitenancy is and how it’s implemented in Spring Boot project.
Download the source code
The project is freely available on our Bitbucket repository. Feel free to fix any mistakes and to comment here if you have any questions or feedback.
https://bitbucket.org/n47/spring-boot-multitenancy/src/master/


Thanks for sharing this blog, it was really helpful.
Can you please help me understand the role of flyway? I could not get what flyway doing here.
Hi Kuldeep Singh,
In the example is shown that if you want to include a flyway in your project, you should disable it in properties files, and configure it into the code, class DataSourceConfig. But, if you don’t need database versioning you can ignore that part.
Regards