If you need to build large distributed systems, then this is the place to be. We are going to talk about some of the components that the solution from Spring and Netflix provides and how easy it is to use them. If you follow this article, in the end, you will create a complete application with service discovery, client-side load balancing, feign clients and much more.
Before we start, let’s explain some of the terms that we are going to use in this article:
- Eureka – a service discovery service, where every client will register itself
- Ribbon – a client-side load balancer
- Feign client – declarative web service client which provides communication between microservices
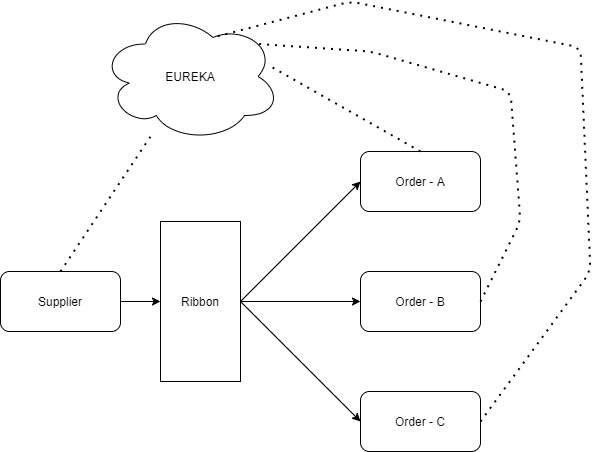
On the picture above it is presented what we are going to build. We will create two user-oriented microservices, one called Supplier and the other called Order. The user will be able to place an order for some supplier but the supplier in order to perform the order will call the Order microservice. For the communication between Supplier and Order, we will use Feign Client in combination with service discovery that will be enabled by Eureka. In the end, we are going to scale the microservice Order and we will see how the Ribbon load balancer will work when we have more instances.
Let’s start by creating the Eureka service discovery microservice.
The easiest way is to go to the Spring Initializer and create your microservice with the following properties as you can see on the picture below:
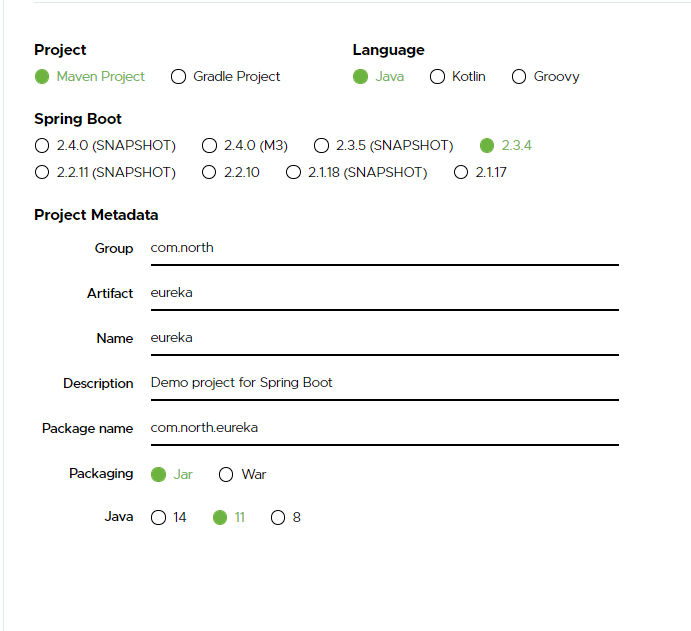
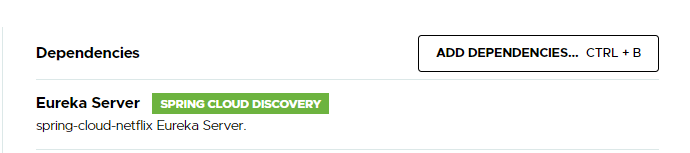
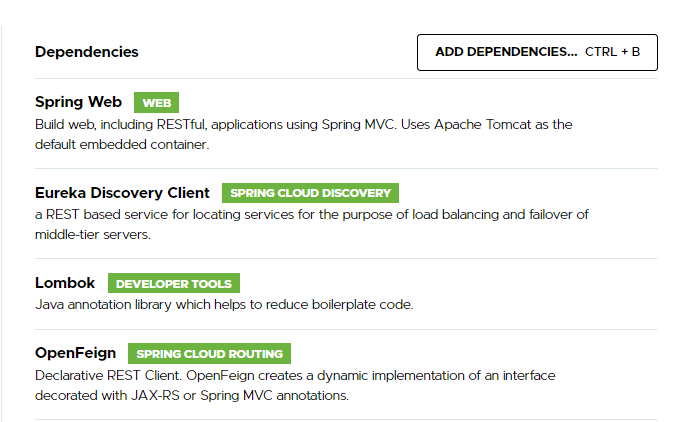
The required dependencies for our service discovery service are only the Eureka Server.
Once you are done with this, click on generate and your project will be downloaded. Open it via your favourite IDE (I will be using IntelliJ) and there are just two more things that you need to do. In your main class you should add the following annotation @EnableEurekaServer:
package com.north;

import org.springframework.boot.SpringApplication;
import org.springframework.boot.autoconfigure.SpringBootApplication;
import org.springframework.cloud.netflix.eureka.server.EnableEurekaServer;

@SpringBootApplication
@EnableEurekaServer
public class EurekaApplication {

    public static void main(String[] args) {
        SpringApplication.run(EurekaApplication.class, args);
    }

}
One more thing that we will need to change is in our application.yml file. By default an application.properties file is created, but if this is the case we will rename it to application.yml and add the following code:
server:
  port: 8761

eureka:
  instance:
    hostname: localhost
  client:
    registerWithEureka: false
    fetchRegistry: false
    serviceUrl:
      defaultZone: http://${eureka.instance.hostname}:${server.port}/eureka/
With these, we are setting the server port and the service URL. And there we have our first service discovery. Start the application and go to your browser and enter the following link: http://localhost:8761. Now we should be able to see the eureka homepage:
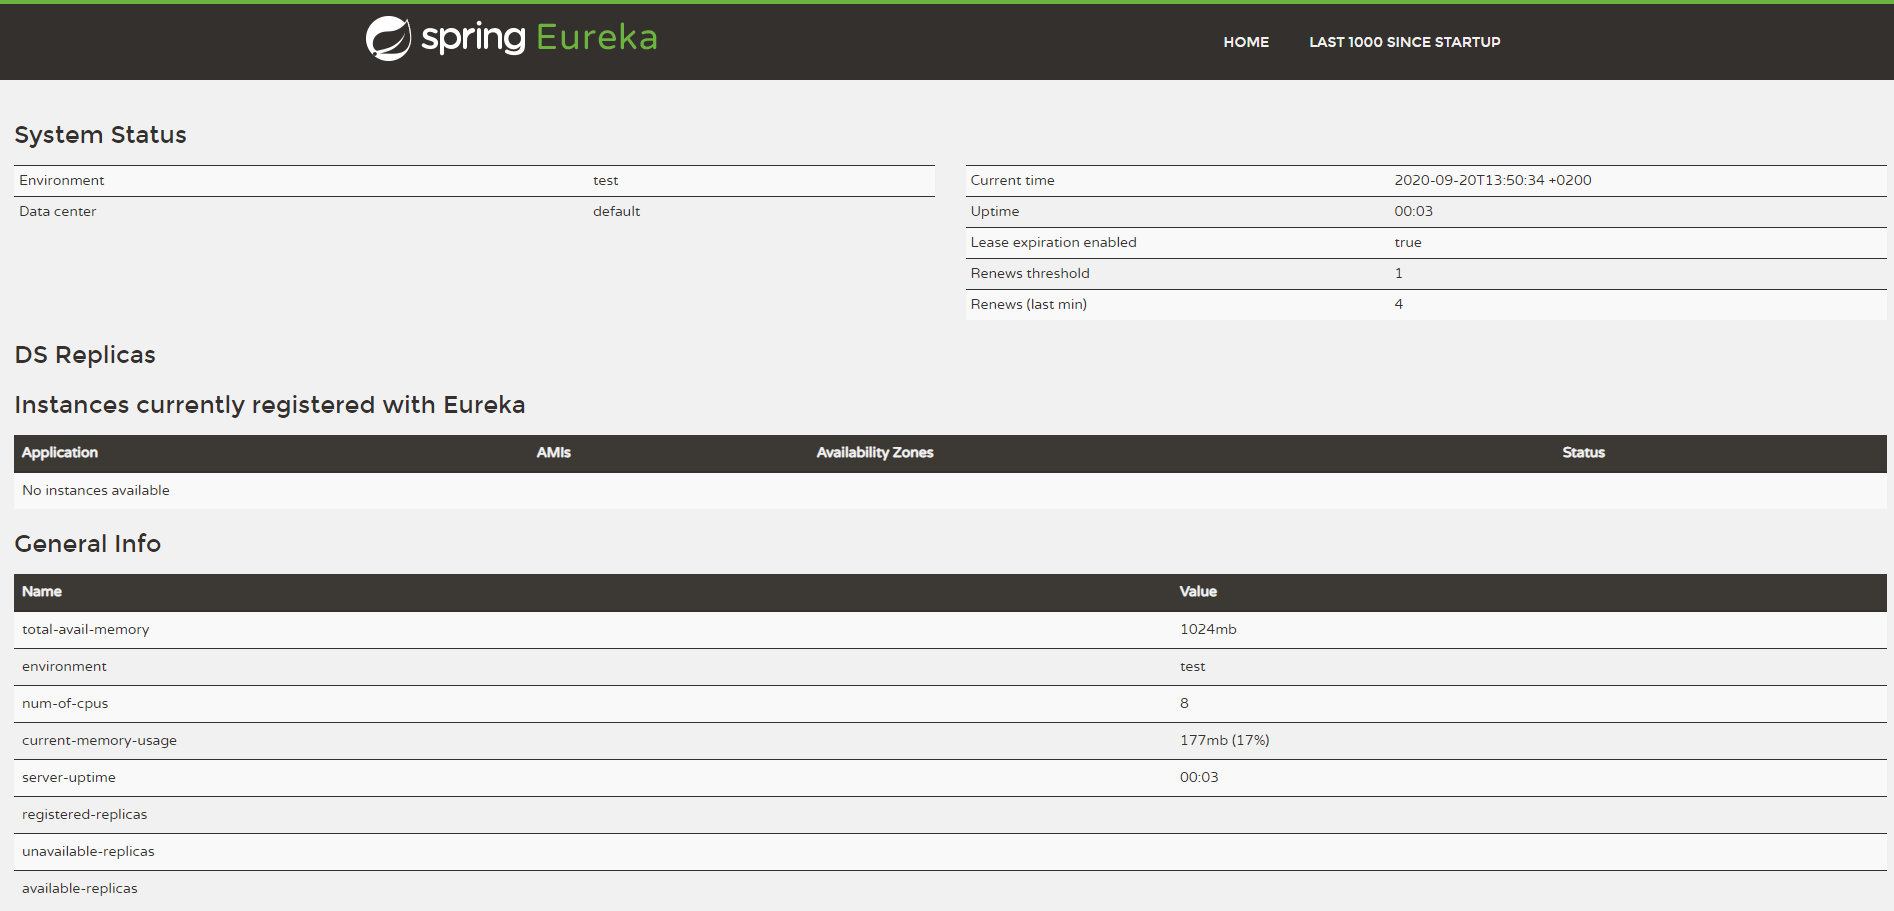
As you can see, there are no instances registered at the moment. So let’s create our first instance.
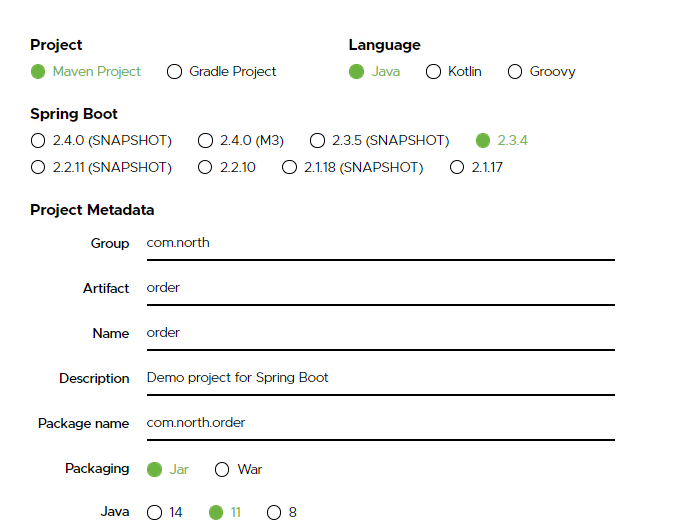
We will start by creating the Order microservice. Go to the Spring Initializer and create a project with the following properties:
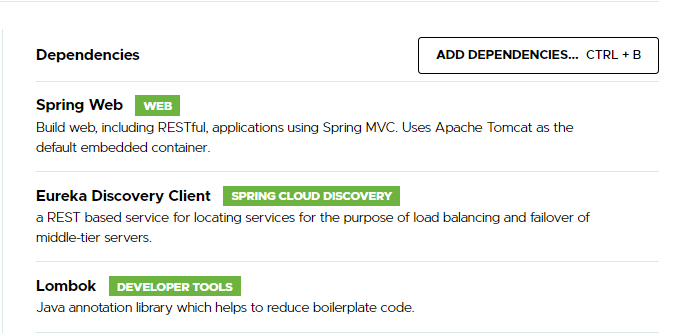
And we will add the following dependencies:
Let’s start by setting the name and the port of the application. Change your application.properties to application.yml and add the following code:
spring:
  application:
    name: order

server:
  port: 8082
Now the name of the application is set to Order and the application will run on port: 8082. If this port is taken on your machine, feel free to change the port. We are not going to be dependent on this port but you will see that we will be dependent on the application name when we want to communicate with it.
In order to enable this instance to be discovered by Eureka we need to add the following annotation to the main class:
package com.north.order;

import org.springframework.boot.SpringApplication;
import org.springframework.boot.autoconfigure.SpringBootApplication;
import org.springframework.cloud.client.discovery.EnableDiscoveryClient;

@EnableDiscoveryClient
@SpringBootApplication
public class OrderApplication {

    public static void main(String[] args) {
        SpringApplication.run(OrderApplication.class, args);
    }

}
Now if we start the application and go back to the homepage of eureka by going to our browser and entering the following link: http://localhost:8761 we should be able to see that this instance is registered to Eureka.

Since we confirmed that this instance is registered to Eureka we can now create an endpoint from where an order can be placed. First, let’s create an entity Order:
package com.north.order.domain;

import lombok.AllArgsConstructor;
import lombok.Data;
import lombok.NoArgsConstructor;

@Data
@AllArgsConstructor
@NoArgsConstructor
public class Order {

    private String productName;
    private int quantity;
}
It is a simple entity that will contain the name of the products and how many pieces of it we want to order. The rest controller should contain the following logic:
package com.north.order.ctrl;

import com.north.order.domain.Order;
import lombok.extern.slf4j.Slf4j;
import org.springframework.http.ResponseEntity;
import org.springframework.web.bind.annotation.PostMapping;
import org.springframework.web.bind.annotation.RequestBody;
import org.springframework.web.bind.annotation.RestController;

@RestController
@Slf4j
public class OrderController {

    @PostMapping(value = "/order")
    ResponseEntity<Void> placeOrder(@RequestBody Order order) {
        log.info("Placing an order for product: {} with quantity: {}", order.getProductName(), order.getQuantity());
        return ResponseEntity.ok().body(null);
    }
}
You can test this endpoint by using Postman or some similar tool but we want the Supplier microservice to call this endpoint.
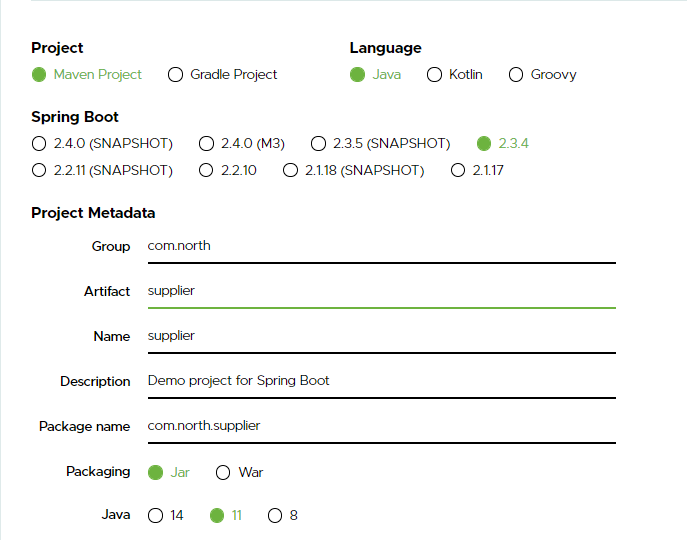
Now that we are done with the Order microservice, let’s build the Supplier. Again we will open the Spring Initializer and create a project with the following properties:
And we will have the following dependencies:
Generate the project and import it into your IDE. First thing let’s change the application.properties file by changing the extension to yml and add the following code:
spring:
  application:
    name: supplier
server:
  servlet:
    context-path: /supplier
With this, we have set the application name and set a context-path. Since here we didn’t change the port, the default 8080 will be taken. In order to register this instance to Eureka and to be able to use Feign Client we need to add the following two annotations in our main class:
package com.north.supplier;

import org.springframework.boot.SpringApplication;
import org.springframework.boot.autoconfigure.SpringBootApplication;
import org.springframework.cloud.client.discovery.EnableDiscoveryClient;
import org.springframework.cloud.openfeign.EnableFeignClients;

@SpringBootApplication
@EnableFeignClients
@EnableDiscoveryClient
public class SupplierApplication {

    public static void main(String[] args) {
        SpringApplication.run(SupplierApplication.class, args);
    }

}
Next thing is to create the same entity Order as we have in the previous microservice.
package com.north.supplier.domain;

import lombok.AllArgsConstructor;
import lombok.Data;
import lombok.NoArgsConstructor;

@Data
@AllArgsConstructor
@NoArgsConstructor
public class Order {

    private String productName;
    private int quantity;
}
For communication with the Order microservice we will create a feign client called OrderClient:
package com.north.supplier.service;

import com.north.supplier.domain.Order;
import org.springframework.cloud.openfeign.FeignClient;
import org.springframework.web.bind.annotation.PostMapping;
import org.springframework.web.bind.annotation.RequestBody;

@FeignClient("order")
public interface OrderClient {

    @PostMapping("/order")
    void performOrder(@RequestBody Order order);
}
As a value in the @FeignClient annotation, we need to use the application name of the microservice that we want to communicate with, in our case Order. The method written here is the one that will call the previously exposed endpoint in the Order microservice. Let’s create a service that will use this feign client and execute an order:
package com.north.supplier.service;

import com.north.supplier.domain.Order;
import lombok.RequiredArgsConstructor;
import lombok.extern.slf4j.Slf4j;
import org.springframework.stereotype.Service;

@Slf4j
@Service
@RequiredArgsConstructor
public class OrderService {

    private final OrderClient orderClient;

    public void placeOrder(Order order) {
        log.info("Requesting order ms to place an order");
        orderClient.performOrder(order);
    }
}
At the end we will expose one endpoint that we can use to test this scenario:
package com.north.supplier.ctrl;

import com.north.supplier.domain.Order;
import com.north.supplier.service.OrderService;
import lombok.RequiredArgsConstructor;
import lombok.extern.slf4j.Slf4j;
import org.springframework.http.ResponseEntity;
import org.springframework.web.bind.annotation.RequestBody;
import org.springframework.web.bind.annotation.RequestMapping;
import org.springframework.web.bind.annotation.RestController;

@RestController
@RequiredArgsConstructor
@Slf4j
public class OrderController {

    private final OrderService orderService;

    @RequestMapping(value = "/order")
    public ResponseEntity<Void> placeOrder(@RequestBody Order order) {
        orderService.placeOrder(order);
        return ResponseEntity.ok().body(null);
    }
}
Now that we are done, let’s start the application. First, if we check the Eureka homepage we should be able to see this instance also that is registered. You can also see this in the console of where the Supplier is being started:
2020-09-20 20:02:43.907  INFO 7956 --- [nfoReplicator-0] com.netflix.discovery.DiscoveryClient    : DiscoveryClient_SUPPLIER/host.docker.internal:supplier: registering service...
2020-09-20 20:02:43.911  INFO 7956 --- [nfoReplicator-0] com.netflix.discovery.DiscoveryClient    : DiscoveryClient_SUPPLIER/host.docker.internal:supplier - registration status: 204
To test this complete scenario make sure that all three applications are started and that the Order and Supplier are registered to Eureka. By using postman I will send a post request to the endpoint on the Supplier microservice and I should be able to see the order being placed in the Order microservice:
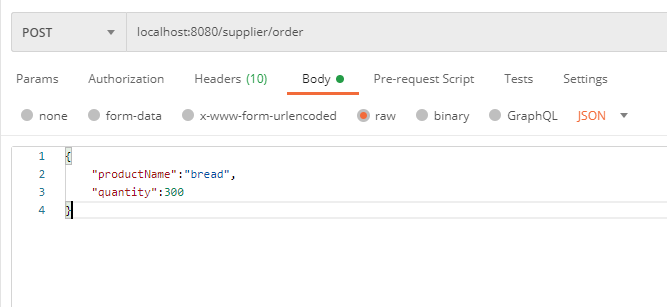
Just make sure that you have added in your Headers tab a header with key: Content-Type and value application/json. What should happen if execute this request is in the Supplier microservice console? -we should see the following log:
2020-09-20 20:20:36.674 INFO 19420 --- [nio-8080-exec-4] com.north.supplier.service.OrderService : Requesting order ms to place an order
in the Order microservice console we should see:
2020-09-20 20:20:36.678 INFO 17800 --- [io-8082-exec-10] com.north.order.ctrl.OrderController : Placing an order for product: bread with quantity: 300
At this point, we managed to create three microservices, two for user purpose and one for service discovery. We used the feign client for communication with microservices. At some point, if we decide to grow this application and there are too many orders to be executed and we add some complex logic to our Order microservice, we will reach a point where the Order microservice won’t be able to execute all the orders. Let’s see what will happen if we scale our Order microservice.
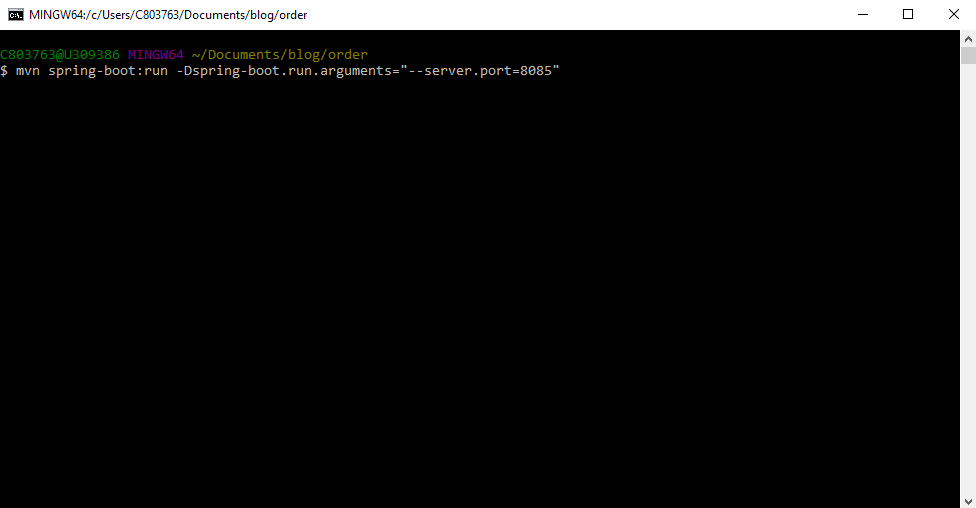
First, from your IDE stop the Order microservice. Just be sure that Eureka and Supplier are still running. Now go to the folder directory in the Order project (something like …\Documents\blog\order) and open in that location three command prompt windows. In each of them we will type the following command:
mvn spring-boot:run -Dspring-boot.run.arguments="--server.port=8084"
in the second:
mvn spring-boot:run -Dspring-boot.run.arguments="--server.port=8085"
in the third:
mvn spring-boot:run -Dspring-boot.run.arguments="--server.port=8086"
It should be something like this:
Three instances of the application should be now up and running on the port that we previously specified. If you open again the Eureka home page, you should be able to see all three instances registered. Now go back to the postman and execute the same post call to Supplier as we did previously and do this many times as fast as possible. Now if you take a look at the command prompt windows that we opened you should be able to see that every time a different instance of the Order microservice is called. This is provided by Ribbon that is provided out of the box on the client-side (in this case the Supplier microservice), without adding some additional code. As we have mentioned before we are not dependent on the port but we are using the application name in order for Supplier to send a request to Order.
To summarize, our Supplier microservice became aware of all the instances and now he is sending the request every time to a different instance of Order so the load will be balanced.
Hope that you enjoyed this article and had fun with it. The code is available on the our N47 Bitbucket: