Implementing Spring Boot internationalization can be easily achieved using Resource Bundles. I will show you a code example of how you can implement it in your projects.
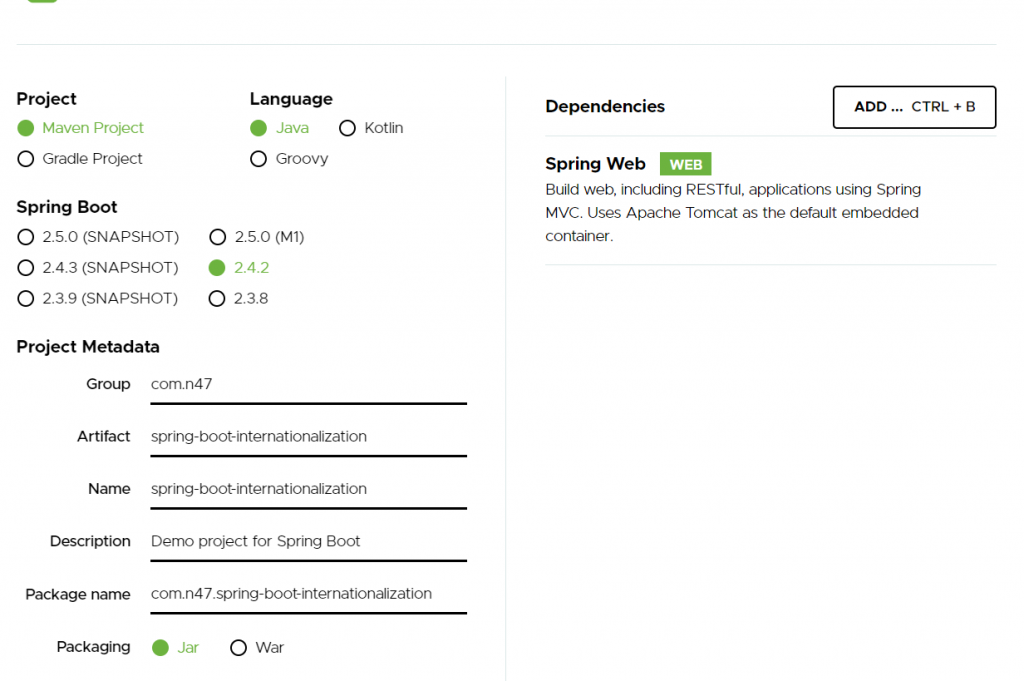
Let’s create a simple Spring Boot application from start.spring.io.

The first step is to create a resource bundle (a set of properties files with the same base name and language suffix) in the resources package.
I will create properties files with base name texts and only one key greeting:
- texts_en.properties
- texts_de.properties
- texts_it.properties
- texts_fr.properties
In all of that files I will add the value “Hello World !!!”, and the translations for that phrase. I was using Google Translate so please do not judge me if something is wrong :).
After that, I will add some simple YML configuration in application.yml file which I will use later.
server:
  port: 7000

application:
  translation:
    properties:
      baseName: texts
      defaultLocale: de
Now, let’s create the configuration. I will create two Beans LocaleResolver and ResourceBundleMessageSource. Let’s explain both of them.
With the LocaleResolver interface, we are defining which implementation we are going to use. For this example, I chose to use AcceptHeaderLocaleResolver implementation. It means that the language value must be provided via Accept-Language header.
@Bean
    public LocaleResolver localeResolver() {
        AcceptHeaderLocaleResolver acceptHeaderLocaleResolver = new AcceptHeaderLocaleResolver();
        acceptHeaderLocaleResolver.setDefaultLocale(new Locale(defaultLocale));
        return acceptHeaderLocaleResolver;
    }
With ResourceBundleMessageSource we are defining which bundle we are going to use in the Translator component (I will create it later 🙂 ).
@Bean(name = "textsResourceBundleMessageSource")
    public ResourceBundleMessageSource messageSource() {
        ResourceBundleMessageSource rs = new ResourceBundleMessageSource();
        rs.setBasename(propertiesBasename);
        rs.setDefaultEncoding("UTF-8");
        rs.setUseCodeAsDefaultMessage(true);
        return rs;
    }
Now, let’s create the Translator component. In this component, I will create only one method, toLocale. In that method, I will fetch the Locale from the LocaleContexHolder and I will take the translation from the resource bundle.
@Component
public class Translator {

    private static ResourceBundleMessageSource messageSource;

    public Translator(@Qualifier("textsResourceBundleMessageSource") ResourceBundleMessageSource messageSource) {
        this.messageSource = messageSource;
    }

    public static String toLocale(String code) {
        Locale locale = LocaleContextHolder.getLocale();
        return messageSource.getMessage(code, null, locale);
    }
}
That’s all the configuration we need for this feature. Now, let’s create Controller, Service and TranslatorCodes Util classes so we can test the APIs.
@RestController
@RequestMapping("/index")
public class IndexController {

    private final TranslationService translationService;

    public IndexController(TranslationService translationService) {
        this.translationService = translationService;
    }

    @GetMapping("/translate")
    public ResponseEntity<String> getTranslation() {
        String translation = translationService.translate();
        return ResponseEntity.ok(translation);
    }
}
@Service
public class TranslationService {

    public String translate() {
        return toLocale(GREETINGS);
    }
}
public class TranslatorCode {
    public static final String GREETINGS = "greetings";
}
Now, you can start the application. After the application is started successfully, you can start making API calls.
Here is an example of API call that you can use as a cURL command.
curl –location –request GET “localhost:7000/index/translate” –header “Accept-Language: en”
These are some of the responses from the calls I made:

You can change the default behaviour, add some protection, add multiple resource bundles, you are not limited to using this feature.
Download the source code
This project is available on our BitBucket repository. Feel free to fix any mistakes and to leave a comment here if you have any questions or feedback.
https://bitbucket.org/n47/spring-boot-internationalization/src/master/


